03、Jenkins 进阶:使用jenkins共享库实现日志格式化输出
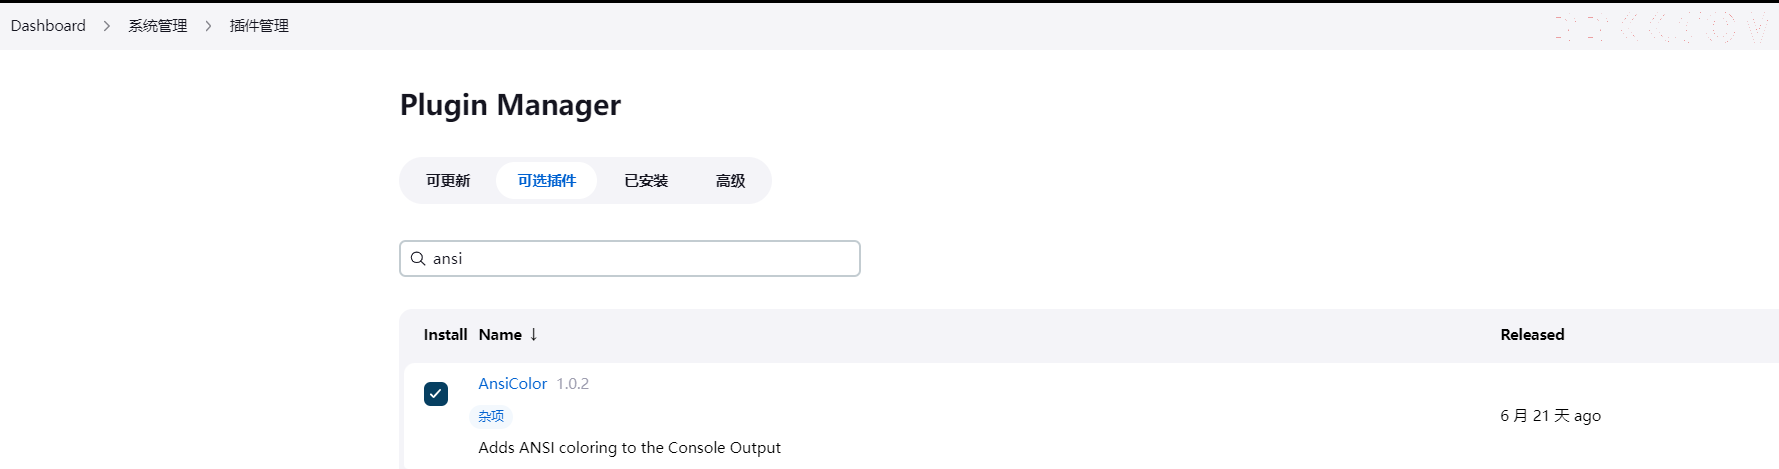
一、添加AnsiColor插件
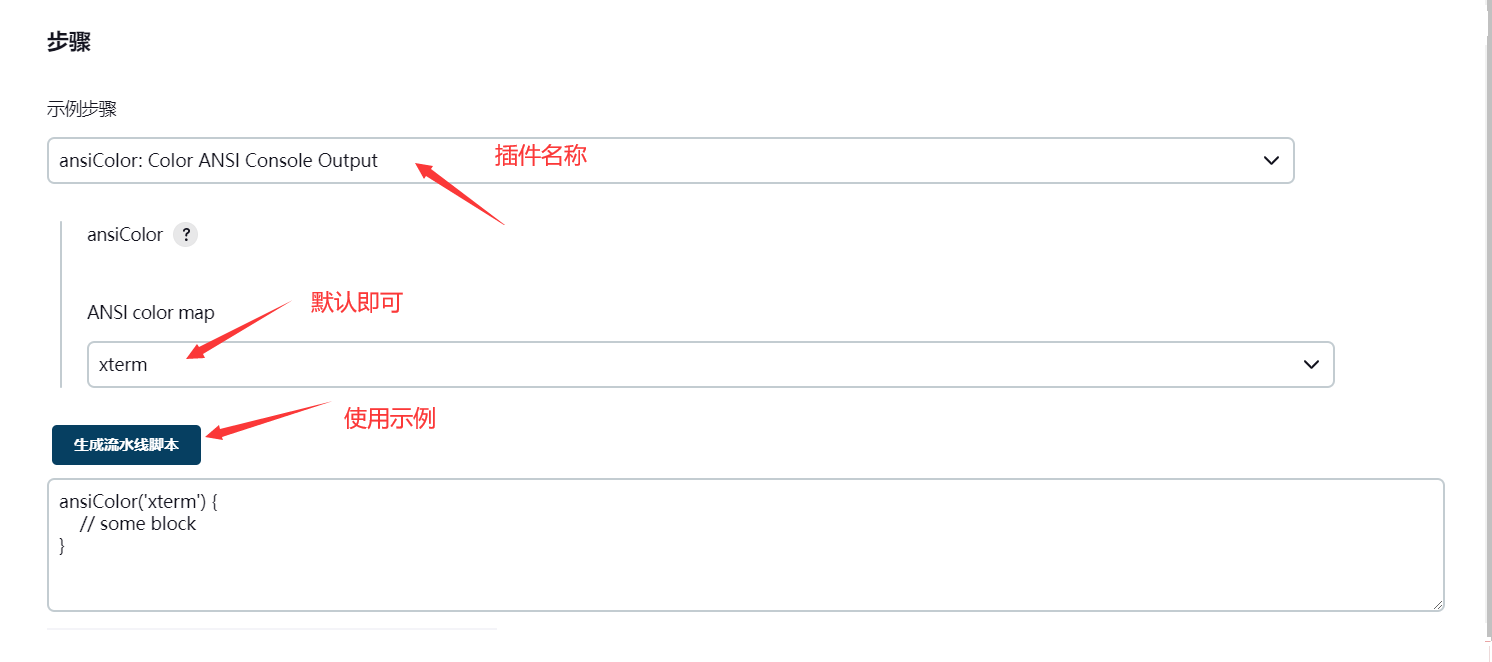
二、查看插件语法
1.打开任意pipline项目配置,找到流水线语法,并点击

跳转连接,选择插件,查看帮助
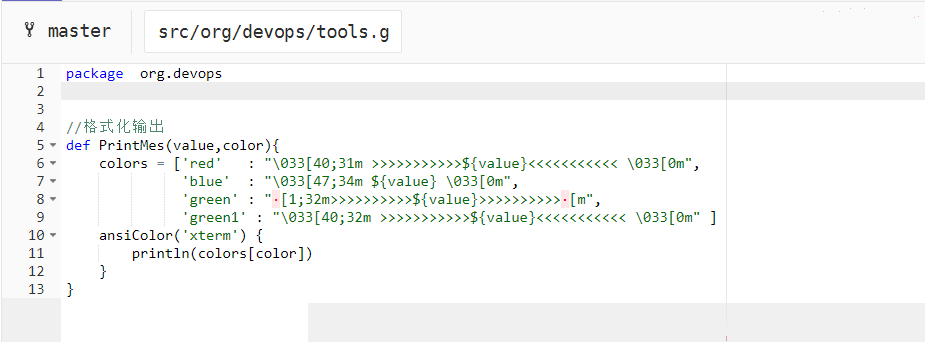
三、修改sharelibrary脚本,优化打印方法


package org.devops
//格式化输出
def PrintMes(value,color){
colors = ['red' : "\033[40;31m >>>>>>>>>>>${value}<<<<<<<<<<< \033[0m",
'blue' : "\033[47;34m ${value} \033[0m",
'green' : "[1;32m>>>>>>>>>>${value}>>>>>>>>>>[m",
'green1' : "\033[40;32m >>>>>>>>>>>${value}<<<<<<<<<<< \033[0m" ]
ansiColor('xterm') {
println(colors[color])
}
}
tools.groovy
四、修改jenkins file
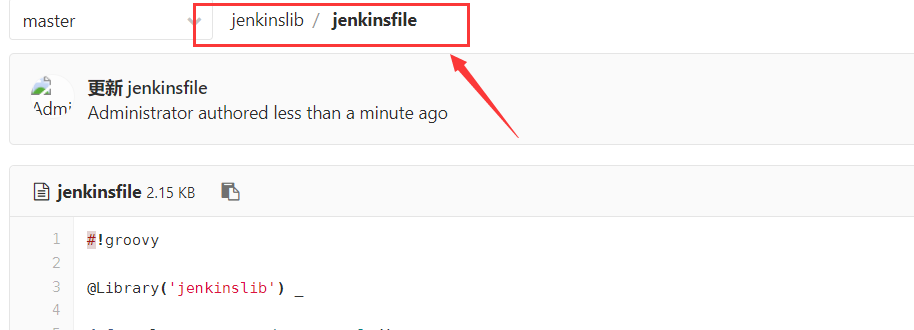


#!groovy

@Library('jenkinslib') _

def tools = new org.devops.tools()

//Pipeline
pipeline {
    agent  any

    options {
        timestamps()  //日志会有时间
        skipDefaultCheckout()  //删除隐式checkout scm语句
        disableConcurrentBuilds() //禁止并行
        timeout(time: 1, unit: 'HOURS')  //流水线超时设置1h
    }

    stages {
        //下载代码
        stage("GetCode"){ //阶段名称
            steps{  //步骤
                timeout(time:5, unit:"MINUTES"){   //步骤超时时间
                    script{ //填写运行代码
                        println('获取代码')
                        tools.PrintMes("获取代码",'green')
                    }
                }
            }
        }

        stage("01"){
            failFast true
            parallel {

                //构建
                stage("Build"){
                    steps{
                        timeout(time:20, unit:"MINUTES"){
                            script{
                                println('应用打包')
                                tools.PrintMes("应用打包",'green')
                            }
                        }
                    }
                }

                //代码扫描
                stage("CodeScan"){
                    steps{
                        timeout(time:30, unit:"MINUTES"){
                            script{
                                print("代码扫描")
                                tools.PrintMes("代码扫描",'green')
                            }
                        }
                    }
                }
            }
        }
    }

    //构建后操作
    post {
        always {
            script{
                println("always")
            }
        }

        success {
            script{
                currentBuild.description = "\n 构建成功!"
            }
        }

        failure {
            script{
                currentBuild.description = "\n 构建失败!"
            }
        }

        aborted {
            script{
                currentBuild.description = "\n 构建取消!"
            }
        }
    }
}
jenkinsfile
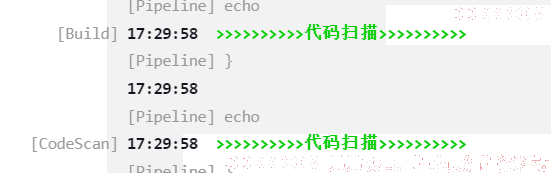
五、运行流水线查看效果
** **