21、Nginx 实战:Nginx 常见问题
1.多个server_name容易产生冲突,会按照如下顺序匹配
1、首先选择所有的字符串完全匹配的server_name。(完全匹配)
2、选择通配符在前面的server_name,如*.bgx.com www.bgx.com
3、选择通配符在后面的server_name,如bgx.* bgx.com bgx.cn
4、最后选择使用正则表达式匹配的server_name
5、如果全部都没有匹配到,那么将选择在listen配置项后加入[default_server]的server块
6、如果没写,那么就找到匹配listen端口的第一个Server块的配置文件
Nginx多个相同Server_name优先级
1.1.环境准备
[root@nginx ~]# mkdir /soft/code{1..3} -p
[root@nginx ~]# for i in {1..3};do echo "<h1>Code $i</h1>" > /soft/code"$i"/index.html;done
1.2.准备多份相同Nginx配置文件
[root@Nginx conf.d]# ll
总用量 12
-rw-r--r-- 1 root root 123 4月  19 19:08 testserver1.conf
-rw-r--r-- 1 root root 123 4月  19 19:09 testserver2.conf
-rw-r--r-- 1 root root 123 4月  19 19:09 testserver3.conf

//内容如下
[root@Nginx conf.d]# cat testserver{1..3}.conf
server {
        listen 80;
        server_name testserver1 192.168.69.113;

        location / {
                root /soft/code1;
                index index.html;
        }
}
server {
        listen 80;
        server_name testserver2 192.168.69.113;

        location / {
                root /soft/code2;
                index index.html;
        }
}
server {
        listen 80;
        server_name testserver3 192.168.69.113;

        location / {
                root /soft/code3;
                index index.html;
        }
}

//检测语法
[root@Nginx conf.d]# nginx -t
nginx: [warn] conflicting server name "192.168.69.113" on 0.0.0.0:80, ignored
nginx: [warn] conflicting server name "192.168.69.113" on 0.0.0.0:80, ignored
nginx: the configuration file /etc/nginx/nginx.conf syntax is ok
nginx: configuration file /etc/nginx/nginx.conf test is successful

//重启Nginx
[root@Nginx conf.d]# nginx -t
1.3.测试访问效果
#1.当用户第一次访问, 由code1.conf返回输出信息
[root@Nginx conf.d]# curl 192.168.69.113
<h1>Code 1</h1>

#2.此时将code1.conf修改为code5.conf后进行重载Nginx
[root@Nginx conf.d]# mv testserver1.conf testserver5.conf
[root@Nginx conf.d]# nginx -s reload

#3.再次访问时, 由code2.conf返回输出信息
[root@Nginx conf.d]# curl 192.168.69.113
<h1>Code 2</h1>
2.如何通过default_server 禁止用户通过IP地址访问,或使用default_server进行导流
2.1禁止直接通过IP访问
[root@web01 conf.d]# cat server4.conf
server {
	listen 80 default_server;
	server_name _;
	return 503;
}
2.2导流:将流量导入自己的网站
[root@web01 conf.d]# cat server4.conf
server {
	listen 80 default_server;
	server_name _;
	return 302 https://www.xuliangwei.com;
}
3.include的作用:
一台服务器配置多个网站,如果配置都写在nginx.conf主配置文件中,会导致nginx.conf主配置文件变得非常庞大而且可读性非常的差。那么后期的维护就变得麻烦。
假设现在希望快速的关闭一个站点,该怎么办?
- 1.如果是写在nginx.conf中,则需要手动注释,比较麻烦
- 2.如果是include的方式,那么仅需修改配置文件的扩展名,即可完成注释
Include包含的作用是为了简化主配置文件,便于人类可读。
inlcude /etc/nginx/online/*.conf #线上使用的配置
/etc/nginx/offline #保留配置,不启用(下次使用在移动到online中)
4.nginx路径root与alias:
root与alias路径匹配主要区别在于nginx如何解释location后面的uri,这会使两者分别以不同的方式将请求映射到服务器文件上,alias是一个目录别名的定义,root则是最上层目录的定义。
root的处理结果是:root路径+location路径
alias的处理结果是:使用alias定义的路径
4.1root路径配置
[root@Nginx ~]# mkdir /local_path/code/request_path/code/ -p
[root@Nginx ~]# echo "Root" > /local_path/code/request_path/code/index.html

//Nginx的root配置
[root@Nginx ~]# cat /etc/nginx/conf.d/root.conf
server {
        listen 80;
        index index.html;
        location /request_path/code/ {
                root /local_path/code/;
        }
}

//请求测试
[root@Nginx conf.d]# curl http://192.168.69.113/request_path/code/index.html
Root

//实际请求本地文件路径为
/local_path/code/'request_path/code'/index.html
4.2alias路径配置
[root@Nginx ~]# mkdir /local_path/code/request_path/code/ -p
[root@Nginx ~]# echo "Alias" > /local_path/code/index.html

//配置文件
[root@Nginx ~]# cat /etc/nginx/conf.d/alias.conf
server {
        listen 80;
        index index.html;
        location /request_path/code/ {
                alias /local_path/code/;
        }
}

//测试访问
[root@Nginx ~]# curl http://192.168.69.113/request_path/code/index.html
Alias

//实际访问本地路径
/local_path/code/'index.html'
4.3现实场景会用到这种写法:
server {
        listen 80;
        server_name image.oldboy.com;

        location / {
                root /code;
        }

		location ~* ^.*\.(png|jpg|gif)$ {   请求图片回到alias定义的路径去找
                alias /code/images/;
        }
}
5.nginx的try_file路径匹配,按顺序检查文件是否存在
[root@bgx ~]# cat /etc/nginx/conf.d/try_file.conf
server {
    listen 80;
    server_name try.bgx.com;
    root /code;

    location / {
        try_files $uri $uri/ /404.html;
    }
}
- 1.检查用户请求的uri内容是否存在本地,存在则解析
- 2.如果请求的url不存在,则访问对应站点目录中的404.html文件
- 3.最后交给index.php处理
\(uri匹配文件名,如用户请求try.oldboy.com/index.html那么\)uri则会上对应的root指定的站点目录中查找是否存在该文件
\(uri/匹配目录下的文件,如用户请求try.oldboy.com/,那么\)uri/则会上/对应root指定的站点目录中查找文件
5.1.演示环境准备
[root@Nginx ~]# echo "Try-Page" > /soft/code/index.html
[root@Nginx ~]# echo "Tomcat-Page" > /soft/app/apache-tomcat-9.0.7/webapps/ROOT/index.html

//启动tomcat
[root@Nginx ~]# sh /soft/app/apache-tomcat-9.0.7/bin/startup.sh
//检查tomcat端口
[root@Nginx ~]# netstat -lntp|grep 8080
tcp6       0      0 :::8080                 :::*                    LISTEN      104952/java
5.2.当用户访问xx.com/index.html则由Nginx提供,如果Nginx没有该文件则由Tomcat服务提供该文件
[root@web01 conf.d]# cat try.conf
server {
    listen 80;
    server_name try.oldboy.com;
    root /code;
    index index.html;

    location / {
        try_files $uri $uri/  @java_page; :@是内部跳转,会找location匹配
    }

	location @java_page {
		proxy_pass http://172.16.1.8:8080;
	}
}

//重启Nginx
[root@Nginx ~]# nginx -s reload
5.3.测试tryfiles
[root@Nginx ~]# curl http://192.168.69.113/index.html
Try-Page

//将/soft/code/index.html文件移走
[root@Nginx ~]# mv /soft/code/{index.html,index.html_bak}

//发现由Tomcat吐回了请求
[root@Nginx ~]# curl http://192.168.69.113/index.html
Tomcat-Page
6.Nginx调整上传文件大小
在nginx使用过程中,上传文件的过程中,通常需要设置nginx报文大小限制。避免出现413 Request Entity Too Large
nginx上传文件大小限制配置语法
Syntax:client_max_body_size size;
Default:client_max_body_size 1m;
Context:http,server,location
nginx上传文件大小限制配置示例:
也可以放在http层,全局生效
server{
...
	client_max_body_size 200m;
...
}
7.Nginx优雅显示错误页面
error_page错误日志
[root@web01 conf.d]# cat error.conf
server {
    listen 80;
    server_name try.oldboy.com;
    root /code;
    location / {
    	index index.html;
    }
	location ~ \.php$ {
    	fastcgi_pass 127.0.0.0:9000;
    }
   如服务器返回如下错误状态码,则进行跳转,跳转至/xxx.jpg
	#error_page 403 404 /40x.jpg;
	#error_page 500 502 503 404 /50x.jpg;

	#精准定位错误类型
	error_page 403 /403.jpg;
    error_page 404 /404.jpg;

	#精准匹配访问
	location = /404.jpg {
    	root /code/err;		这会到/code/err目录下找404.jpg
    }
	location = /50x.jpg {
    	root /code/err;
    }
}
8.location优先级
一个server出现多个location
| 完整匹配 | 优先级高 |
|---|---|
| = | 进行普通字符精确匹配, 完全匹配 |
| ^~ | 表示普通字符匹配, 使用前缀匹配 |
| 正则匹配 | 匹配后会继续查找更精确匹配的location |
| ~ | 区分大小写匹配 |
| ~* | 不区分大小写 |
8.1.实例准备
[root@Nginx conf.d]# cat testserver.conf
server {
        listen 80;
        server_name 192.168.69.113;
        root /soft;
        index index.html;

        location = /code1/ {
               rewrite ^(.*)$ /code1/index.html break;
        }

        location ~ /code* {
        rewrite ^(.*)$ /code3/index.html break;
        }
        location ^~ /code {
                rewrite ^(.*)$ /code2/index.html break;
        }
}
8.2.测试效果
[root@Nginx conf.d]# curl http://192.168.69.113/code1/
<h1>Code 1</h1>

//注释掉精确匹配=, 重启Nginx
[root@Nginx ~]# curl http://192.168.69.113/code1/
<h1>Code 2</h1>

//注释掉^~, 重启Nginx
[root@Nginx ~]# curl http://192.168.69.113/code1/
<h1>Code 3</h1>
9.获取用户真实IP
Nginx传递用户的真实IP地址
$remote_addr 只能获取到最近一台服务器访问IP
- x_forwarded_for 头部信息容易被篡改
- nginx Realip_module
9.1第一种方法:x_forwarded_for
9.1.1、准备三台服务器
| 角色 | 外网IP(NAT) | 内网IP(LAN) | 安装工具 |
|---|---|---|---|
| web01 | eth0:10.0.0.7 | eth1:172.16.1.7 | nginx |
| lb01 | eth0:10.0.0.5 | eth1:172.16.1.5 | nginx |
| lb02 | eth0:10.0.0.6 | eth1:172.16.1.6 | nginx |
9.1.2、使用官方仓库安装Nginx
[root@web01 ~]# cat /etc/yum.repos.d/nginx.repo
[nginx]
name=nginx repo
baseurl=http://nginx.org/packages/centos/7/$basearch/
gpgcheck=0
enabled=1

#安装Nginx
[root@web01 ~]# yum install nginx -y
9.1.3、启动三台nginx
systemctl start nginx
systemctl enable nginx
9.1.4、web01上配置
修改日志格式

写配置文件
[root@web01 conf.d]# cat proxy.web.xly.com.conf
server {
	listen 80;
	server_name web.xly.com;

	location / {
		root /web;
		index index.html;
	}
}
9.1.5、lb01上的配置
[root@lb01 conf.d]# vim proxy.web.xly.com.conf
server {
        listen 80;
        server_name web.xly.com;

        location / {
                proxy_pass http://10.0.0.6:80;
                include proxy_params;
        }
}
9.1.6、lb02上的配置
[root@lb02 conf.d]# cat proxy.web.xly.com.conf
server {
	listen 80;
	server_name web.xly.com;

	location / {
		proxy_pass http://10.0.0.7:80;
		include proxy_params;
	}
}
9.1.7、本地hosts解析
10、 0.0.5web.xly.com;
9.1.8、浏览器访问
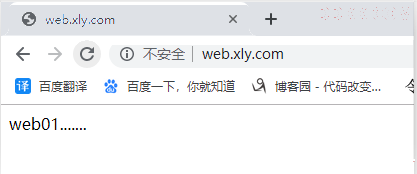
9.1.9、查看日志

9.2第二种方法:nginx Realip_module
使用nginx Realip_module获取多级代理下的客户端真实IP地址,需要在Web上配置
set_real_ip_from  10.0.0.5;
set_real_ip_from  10.0.0.6;
set_real_ip_from  10.0.0.7;
real_ip_header    X-Forwarded-For;
real_ip_recursive on;
set_real_ip_from:真实服务器上一级代理的IP地址或者IP段,可以写多行
real_ip_header:从哪个header头检索出需要的IP地址
real_ip_recursive:递归排除set_real_ip_from里面出现的IP,其余没有出现的认为是用户真实IP
例如:"10.0.0.1, 10.0.0.5, 10.0.0.6"
10、 0.0.5,10.0.0.6都出现在set_real_ip_from中,仅仅10.0.0.1没出现,那么他就被认为是用户的ip地址,并且赋值到$remote_addr变量;
10.常见HTTP状态码
200 正常请求
301 永久跳转
302 临时跳转
400 请求参数错误
401 账户密码错误(authorization required)
403 权限被拒绝(forbidden)
404 文件没找到(Not Found)
413 用户上传文件大小限制(Request Entity Too Large)
502 后端服务无响应(boy gateway)
504 后端服务执行超时(Gateway Time-out)
11.网站访问原理
网站相关术语
如果一栋大厦里所有工作人员通过1个IP公网接口上网, 总共100个设备, 当所有人同时请求一个网站,
并且刷新了5次, 那么请求pv、ip、uv分别是多少
pv:页面浏览量 500
uv:唯一设备100
ip:唯一出口 1
11.1.DNS流程
- 1.查询本地Hosts
- 2.请求本地localDNS
- 3.返回对应的IP
11.2.HTTP连接
-
1.建立TCP三次握手,发送请求内容, 请求头、请求的行、请求的主体
-
2.将请求传递给负载均衡, 负载均衡做对应的调度
-
3.如果请求的是静态页面, 那么调度至对应的静态集群组即可
-
4.如果请求的是动态页面, 将请求调度至动态集群组
-
1.如果仅仅是请求页面, 可能会经过Opcache缓存返回
-
2.如果请求页面需要查询数据库, 或者是往数据库插入内容
-
3.检查对应的操作是查询还是写入, 如果是查询数据库
-
4.检查查询的内容是否有被缓存, 如有缓存则返回
-
5.检查查询语句, 将查询结果返回
-
6.内存缓存Redis缓存对应的查询结果
-
7.返回对应客户端请求的内容至于WEB节点
-
8.WEB节点收到请求后返回内容至负载均衡
-
9.负载均衡返回客户端内容, TCP四次断开
11.3.HTTP断开连接
面试时需注意:
1、 按照分层结构;
CDN层->负载层->WEB层->存储层->缓存层->数据库层
同时需要注意, 每一层都有对应的缓存机制
12.Nginx优化方案
Nginx优化
1.gzip压缩
2.expires静态文件缓存
3.调整网络IO模型,调整Nginx worker进程的最大连接数
5.隐藏Nginx名称和版本号
6.配置防盗链,防止资源被盗用
7.禁止通过IP地址访问,禁止恶意域名解析,只允许域名访问
8.防DDOS、cc攻击, 限制单IP并发请求连接
9.配置错误页面,根据错误代码指定网页反馈用户
10.限制上传资源目录被程序访问,防止木马入侵系统
11.Nginx加密传输优化
13.Nginx架构总结
基于Nginx中间件的架构
13.1.了解需求(定义Nginx在服务体系中的角色)
    静态资源服务的功能设计
    类型分类(视频、图片、html)
    浏览器缓存
    防盗链
    流量限制
    防资源盗用
    压缩(压缩模式, 压缩比例, 压缩类型)
    代理服务
    协议类型
    正向代理
    反向代理
    负载均衡
    代理缓存
    头信息处理
    Proxy_Pass
    LNMP
    动静分离
13.2.设计评估
    硬件 CPU、内存、磁盘
    系统(用户权限、日志目录存放)
    代理服务/负载均衡 (CPU、内存)
    静态资源服务(硬盘容量、硬盘转速)
    动态资源服务(硬盘转速、读写效率)
    缓存资源服务(SSD固态)
13.3.配置注意事项
    合理配置
    了解原理
    http协议原理
    http状态原理
    操作系统原理
    关注日志
    日志是否有打开
    是否有对应请求
    请求状态码信息符合
    错误日志信息吐出来
    错误日志内容和含义