01、Nginx 实战:Linux基础优化
1、添加一个用户
[root@oldboy ~]# useradd oldboy
[root@oldboy ~]# id oldboy
uid=500(oldboy) gid=500 (oldboy) groups=500(oldboy)
[root@oldboy ~]# echo 123456lpasswd --stdin oldboy
Changing password for user oldboy.
passwd: all authentication tokens updated successfully.
2、加到sudo管理, oldboy就相当于管理员
[root@oldboy ~]# visudo
[root@oldboy ~]# grep -w oldboy /etc/sudoers
oldboy  ALL=(ALL)  NOPASSWD: ALL

远程连接直接用oldboy
弃用root登录,改用oidboy用户登录。
[oldboy@oldboy ~]$ whoami
oldboy
[oldboy@oldboy ~]$ sudo su -
[root@oldboy ~]# whoami
root
3、关闭防火墙
centos6
临时关闭: /etc/init.d/iptables   stop
永久关闭: chkconfig iptables off
关闭后检查: /etc/init.d/iptables   status
chkconfig --list  iptables

centos7
临时关闭:systemctl stop firewalld.service
永久关闭: systemctl disable firewalld.service
关闭后检查: systemctl is-active firewalld.service
4、优化SSH远程连接
 备份/etc/ssh/ssh_config
cp /etc/ssh/ssh_config{,.bak}
vim /etc/ssh/ssh_config
###by xly#2018-11-24##
Port 52113				#设置10000以上的端口
PermitRootLogin no			#禁止root远程登录
PermitEmptyPasswords no	#禁止空密码登录
UseDNS no				#不使用DNS解析
GSSAPIAuthentication no	#Xshell连接慢的解决配置
###by xly#2018-11-24##

 把监听网段改掉,即0.0.0.0改为内网网段,例如10.0.0.0
grep -i listen  /etc/ssh/ssh_config

5、关闭SELinux
①永久生效,需要重启计算机
更改配置文件/etc/selinux/config
vim  /etc/selinux/config把SELINUX=enforcing改成SELINUX=disable或者
sed -i 's#SELINUX=enforcing#SELINUX=disable#g' /etc/selinux/config

②临时生效
设置:setenforce  0
查看:getenforce  结果为Permissive
6、设定运行级别为3
设置运行级别:grep 3:initdefault  /etc/inittab
查看运行级别:runlevel
7、 精简开机系统自启动
linux系统要开启的开机自启动服务:sshd、rsyslog、network、crond、sysstat
chkconfig  --list|grep "3:on"   首先查看有哪些服务开机自启动
思路:
关掉不需要的
chkconfig  --list|grep "3:on"|egrep  -v "sshd|rsyslog|network|cron|sysstat"|awk '{print  "chkconfig",$1,"off"}'|bash

优化:
chkconfig  --list|grep "3:on"|grep  -vE "sshd|rsyslog|network|cron|sysstat"|awk '{print  "chkconfig",$1,"off"}'|bash

关闭所有,开启需要的
全关:chkconfig  --list|grep "3:on"|awk '{print  "chkconfig",$1,"off"}'|bash
开需要的:chkconfig --list|egrep  "sshd|rsyslog|network|cron|sysstat"|awk '{print  "chkconfig",$1,"on"}'|bash
8、修改linux服务器字符集
centos6
修改/etc/sysconfig/i18n
vim /etc/sysconfig/i18n把LANG="zh_CN.UTF-8"放进去
查看结果:cat /etc/sysconfig/i18n
使之生效:source /etc/sysconfig/i18n或者. /etc/sysconfig/i18n

centos7
修改  /etc/locale.conf
vim /etc/locale.conf 把 LANG="zh_CN.UTF-8"放进去
查看结果:cat /etc/locale.conf
使之生效:source /etc/locale.conf或者. /etc/locale.conf
9、设置Linux服务器时间同步
①验证时间同步服务器是否可用
/usr/sbin/ntpdate  ntp2.aliyun.com

②设置定时任务
echo 'time sync by liyang at 2019-3-30'  >>/var/spool/cron/root
echo '*/5 * * * * /usr/sbin/ntpdate ntp2.aliyun.com >/dev/null 2>&1' >>/var/spool/cron/root
centos7
/usr/bin/timedatectl
# 安装
yum install chrony
# 启用
systemctl start chronyd
systemctl enable chronyd
# 设置亚洲时区
timedatectl set-timezone Asia/Shanghai
# 启用NTP同步
timedatectl set-ntp yes
10、命令行安全
echo 'export TIMEOUT=300'  >>/etc/profile
echo 'export HISTSIZE=5'  >>/etc/profile
echo 'export HISTFILESIZE=5'  >>/etc/profile

tail -3 /etc/profile
source /etc/profile 使配置文件生效
11、锁定关键系统文件
加锁
chattr +i /etc/passwd /etc/shadow /etc/group /etc/inittab /etc/fstab /etc/sudoers
查看加锁的文件
lsattr

还可以把chattr命令移走:mv /usr/bin/chattr  /opt/oldboy
想用的时候移回来:mv  /opt/oldboy  /usr/bin/chattr
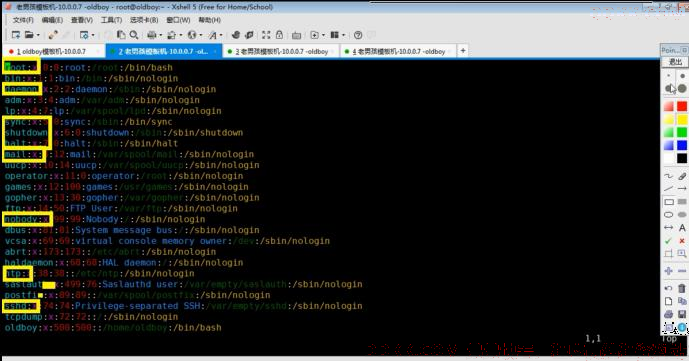
12、清除多余的系统账号
可以选择不优化,加框的是有用的
13、为grup菜单加密码
[root@oldboy ~]# /sbin/grub-md5-crypt
Password:
Retype password:
$1s.Fv.q/$eCasAokskqxvw0ow37hJr1

vi /etc/grub.conf
password --md5 $1s.Fv.q/$eCasAokskqxvw0ow37hJr1
注意:password要加在aplashimage和title之间,否则可能无法生效
14、隐藏版本信息
查看文件信息:cat  /etc/issue
清除文件信息:>/etc/issue.net	>/etc/issue
15、禁止 Linux系统被ping
[rootooldboy ~]# echo "net.ipv4.icmp_echo_ignore_all=1"  >> /etc/sysctl.conf
[rootooldboy ~]#sysctl -p

自己也没办法调试了,Iptables指定内网可以Ping,外网不能ping.
16、调整linux系统文件描述符数量
①文件永久生效
echo ‘*		-	nofile		65535’ >>/etc/security/limits.conf
tail  -1 /etc/security/limits.conf

②临时生效
ulimit  -SHn 65535

可以追加到/etc/rc.local每次开机自启动
echo >>/etc/rc.local<<EOF
#-S user the 'soft' resource limit
#-H user the 'hard' resource limit
#-n the maximum number of open file derscriptors
ulimit -SHn 65535
#-s the maximum stack size
ulimit -s 65535
EOF
17、linux服务器内核参数优化
vim /etc/sysctl.conf添加如下内容:
net.ipv4.tcp_fin_timeout = 2
net.ipv4.tcp_tw_reuse = 1
net.ipv4.tcp_tw_recycle = 1
net.ipv4.tcp_syncookies = 1
net.ipv4.tcp_keepalive_time = 600
net.ipv4.ip_local_port_range = 4000  65000
net.ipv4.tcp_max_syn backlog = 16384
net.ipv4.tcp_ max_ tw_buckets = 36000
net.ipv4.route.gc_timeout = 100
net.ipv4.tcp_syn_retries = 1
net.ipv4.tcp_synack_retries = 1
net.core.somaxconn = 16384
net.core.netdev_max_backlog = 16384
net.ipv4.tcp_max_orphans = 16384
#以下参数是对iptables防火墙的优化,防火墙不开会提示,可以忽略不理.
net.nf_conntrack_max = 25000000
net.netfilter.nf_conntrack_max = 259909  I
net.netfilter.nf_conntrack_tcp_timeout_established = 180
net.netfilter.nf_conntrack_tcp_timeout_time_wait = 120
net.netfilter.nf_conntrack_tcp_timeout_close_wait = 60
net.netfilter.nf_conntrack_tco_timeout_fin_wait = 120
执行svsctl-p生效
18、升级具有典型漏洞的软件版本
首先查看先关软件版本号:
rpm -qa openssl openssh bash
升级已知漏洞的软件版本到最新
yum install openssl openssh bash -y
yum update
19、定时清理邮件服务临时目录垃圾文件
①手动清理的方法如下:
find /var/spool/postfix/maildrop/ -type f|xargs rm -f

②定时清理的方法:做定时任务
写个脚本:
echo "find /var/spool/postfix/maildrop/ -type f|xargs rm -f" >/server/scripts/del_file.sh
做定时任务
echo "00 00 * * * /bin/sh /server/scripts/del_file.sh >/dev/null 2>&1" >>/var/spoll/cron/root
查看做好的定时任务
corntab -l
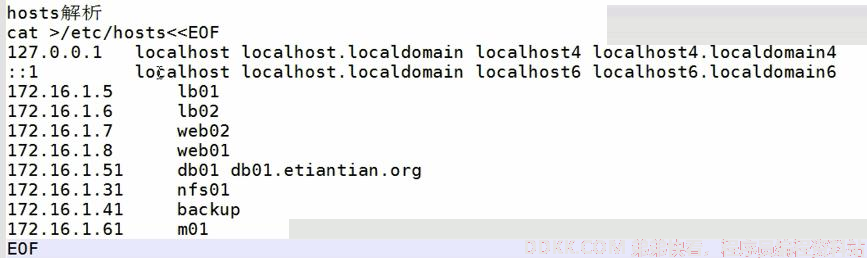
20、hosts解析
都是内网IP
21.配置yum仓库
rm -f /etc/yum.repos.d/*
curl -o /etc/yum.repos.d/CentOS-Base.repo http://mirrors.aliyun.com/repo/Centos-7.repo
curl -o /etc/yum.repos.d/epel.repo http://mirrors.aliyun.com/repo/epel-7.repo
22.安装基础软件包
yum install net-tools vim tree htop iftop \
iotop lrzsz sl wget unzip telnet nmap nc psmisc \
dos2unix bash-completion bash-completion-extra sysstat \
rsync nfs-utils httpd-tools -y