09、Spring Boot - 中整合 JDBC-14000字匠心巨作
1.搭建项目环境
1.创建表
CREATE TABLE users (
userid int(11) NOT NULL AUTO_INCREMENT,
username varchar(30) DEFAULT NULL,
usersex varchar(10) DEFAULT NULL,
PRIMARY KEY (userid)
) ENGINE=InnoDB DEFAULT CHARSET=utf8;
2.创建项目
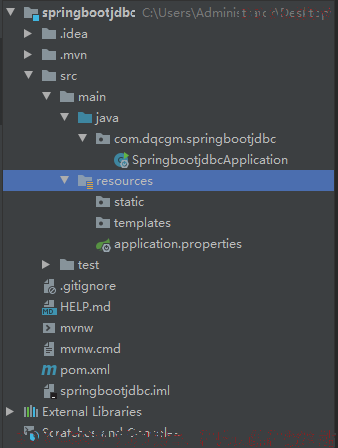
具体创建步骤可以参考博文:传送门!!!
3.修改 POM 文件,添加相关依赖
<?xml version="1.0" encoding="UTF-8"?>
<project xmlns="http://maven.apache.org/POM/4.0.0" xmlns:xsi="http://www.w3.org/2001/XMLSchema-instance"
         xsi:schemaLocation="http://maven.apache.org/POM/4.0.0 https://maven.apache.org/xsd/maven-4.0.0.xsd">
    <modelVersion>4.0.0</modelVersion>
    <parent>
        <groupId>org.springframework.boot</groupId>
        <artifactId>spring-boot-starter-parent</artifactId>
        <version>2.3.1.RELEASE</version>
        <relativePath/> <!-- lookup parent from repository -->
    </parent>
    <groupId>com.dqcgm</groupId>
    <artifactId>springbootjdbc</artifactId>
    <version>0.0.1-SNAPSHOT</version>
    <name>springbootjdbc</name>
    <description>Demo project for Spring Boot</description>

    <properties>
        <java.version>1.8</java.version>
    </properties>

    <dependencies>
        <dependency>
            <groupId>org.springframework.boot</groupId>
            <artifactId>spring-boot-starter-web</artifactId>
        </dependency>

        <!--Thymeleaf 启动器坐标-->
        <dependency>
            <groupId>org.springframework.boot</groupId>
            <artifactId>spring-boot-starter-thymeleaf</artifactId>
        </dependency>

        <!--JDBC 启动器坐标-->
        <dependency>
            <groupId>org.springframework.boot</groupId>
            <artifactId>spring-boot-starter-jdbc</artifactId>
        </dependency>

        <!--数据库驱动坐标-->
        <dependency>
            <groupId>mysql</groupId>
            <artifactId>mysql-connector-java</artifactId>
            <version>5.1.38</version>
        </dependency>

        <dependency>
            <groupId>org.springframework.boot</groupId>
            <artifactId>spring-boot-starter-test</artifactId>
            <scope>test</scope>
            <exclusions>
                <exclusion>
                    <groupId>org.junit.vintage</groupId>
                    <artifactId>junit-vintage-engine</artifactId>
                </exclusion>
            </exclusions>
        </dependency>
    </dependencies>

    <build>
        <plugins>
            <plugin>
                <groupId>org.springframework.boot</groupId>
                <artifactId>spring-boot-maven-plugin</artifactId>
            </plugin>
        </plugins>
    </build>
</project>
2.配置数据源
1.通过自定义配置文件方式配置数据源信息
1.通过@PropertySource 注解读取配置文件
1.添加 Druid 数据源依赖
<?xml version="1.0" encoding="UTF-8"?>
<project xmlns="http://maven.apache.org/POM/4.0.0" xmlns:xsi="http://www.w3.org/2001/XMLSchema-instance"
         xsi:schemaLocation="http://maven.apache.org/POM/4.0.0 https://maven.apache.org/xsd/maven-4.0.0.xsd">
    <modelVersion>4.0.0</modelVersion>
    <parent>
        <groupId>org.springframework.boot</groupId>
        <artifactId>spring-boot-starter-parent</artifactId>
        <version>2.3.1.RELEASE</version>
        <relativePath/> <!-- lookup parent from repository -->
    </parent>
    <groupId>com.dqcgm</groupId>
    <artifactId>springbootjdbc</artifactId>
    <version>0.0.1-SNAPSHOT</version>
    <name>springbootjdbc</name>
    <description>Demo project for Spring Boot</description>

    <properties>
        <java.version>1.8</java.version>
    </properties>

    <dependencies>
        <dependency>
            <groupId>org.springframework.boot</groupId>
            <artifactId>spring-boot-starter-web</artifactId>
        </dependency>

        <!--Thymeleaf 启动器坐标-->
        <dependency>
            <groupId>org.springframework.boot</groupId>
            <artifactId>spring-boot-starter-thymeleaf</artifactId>
        </dependency>

        <!--JDBC 启动器坐标-->
        <dependency>
            <groupId>org.springframework.boot</groupId>
            <artifactId>spring-boot-starter-jdbc</artifactId>
        </dependency>

        <!--数据库驱动坐标-->
        <dependency>
            <groupId>mysql</groupId>
            <artifactId>mysql-connector-java</artifactId>
            <version>5.1.38</version>
        </dependency>

        <!--Druid 数据源依赖-->
        <dependency>
            <groupId>com.alibaba</groupId>
            <artifactId>druid</artifactId>
            <version>1.1.12</version>
        </dependency>

        <dependency>
            <groupId>org.springframework.boot</groupId>
            <artifactId>spring-boot-starter-test</artifactId>
            <scope>test</scope>
            <exclusions>
                <exclusion>
                    <groupId>org.junit.vintage</groupId>
                    <artifactId>junit-vintage-engine</artifactId>
                </exclusion>
            </exclusions>
        </dependency>
    </dependencies>

    <build>
        <plugins>
            <plugin>
                <groupId>org.springframework.boot</groupId>
                <artifactId>spring-boot-maven-plugin</artifactId>
            </plugin>
        </plugins>
    </build>
</project>
2.创建 Properties 文件
jdbc.driverClassName=com.mysql.jdbc.Driver
jdbc.url=jdbc:mysql://localhost:3306/test?useUnicode=true &characterEncoding=utf-8&useSSL=false
jdbc.username=root
jdbc.password=root
3.创建配置类
import com.alibaba.druid.pool.DruidDataSource;
import org.springframework.beans.factory.annotation.Value;
import org.springframework.context.annotation.Bean;
import org.springframework.context.annotation.Configuration;
import org.springframework.context.annotation.PropertySource;

@Configuration
@PropertySource("classpath:/jdbc.properties") //加载指定的 Properties 配置文件
public class JdbcConfiguration {


    @Value("${jdbc.driverClassName}")
    private String driverClassName;
    @Value("${jdbc.url}")
    private String url;
    @Value("${jdbc.username}")
    private String username;
    @Value("${jdbc.password}")
    private String password;

    /*** 实例化 Druid */
    @Bean
    public DataSource getDataSource() {


        DruidDataSource source = new DruidDataSource();
        source.setPassword(this.password);
        source.setUsername(this.username);
        source.setUrl(this.url);
        source.setDriverClassName(this.driverClassName);
        return source;
    }
}
2.通过@ConfigurationProperties 注解读取配置信息
1.创建配置信息实体类
import org.springframework.boot.context.properties.ConfigurationProperties;

@ConfigurationProperties(prefix = "jdbc")//是 SpringBoot 的 注解不能读取其他配置文件,只能读取 SpringBoot 的 application 配置文件
public class JdbcProperties {


    private String driverClassName;
    private String url;
    private String username;
    private String password;

    public String getDriverClassName() {


        return driverClassName;
    }

    public void setDriverClassName(String driverClassName) {


        this.driverClassName = driverClassName;
    }

    public String getUrl() {


        return url;
    }

    public void setUrl(String url) {


        this.url = url;
    }

    public String getUsername() {


        return username;
    }

    public void setUsername(String username) {


        this.username = username;
    }

    public String getPassword() {


        return password;
    }

    public void setPassword(String password) {


        this.password = password;
    }
}
2.修改配置类
import com.alibaba.druid.pool.DruidDataSource;
import org.springframework.boot.autoconfigure.jdbc.JdbcProperties;
import org.springframework.boot.context.properties.EnableConfigurationProperties;
import org.springframework.context.annotation.Bean;
import org.springframework.context.annotation.Configuration;

@Configuration
@EnableConfigurationProperties(JdbcProperties.class)//指定加载哪个配置信息属性类
public class JdbcConfiguration {


    @Bean
    public DataSource getDataSource(JdbcProperties jdbcProperties) {


        DruidDataSource source = new DruidDataSource();
        source.setPassword(jdbcProperties.getPassword());
        source.setUsername(jdbcProperties.getUsername());
        source.setUrl(jdbcProperties.getUrl());
        source.setDriverClassName(jdbcProperties.getDriverClassNa me()); return source;
    }
}
3.@ConfigurationProperties 注解的优雅使用方式
import com.alibaba.druid.pool.DruidDataSource;
import org.springframework.boot.context.properties.ConfigurationProperties;
import org.springframework.context.annotation.Bean;
import org.springframework.context.annotation.Configuration;

@Configuration
public class JdbcConfiguration {


    @Bean
    @ConfigurationProperties(prefix = "jdbc")
    public DataSource getDataSource() {


        DruidDataSource source = new DruidDataSource();
        return source;
    }
}
2.通过 Spring Boot 配置文件配置数据源
- 在 Spring Boot1.x 版 本 中 的 spring-boot-starter-jdbc 启动器中默认使用的是 org.apache.tomcat.jdbc.pool.DataSource 作为数据源
- 在 Spring Boot2.x 版 本 中 的 spring-boot-starter-jdbc 启动器中默认使用的是 com.zaxxer.hikariDataSource 作为数据源
1.使用 Spring Boot 默认的 HikariDataSource 数据源
spring.datasource.url=jdbc:mysql://localhost:3306/test?useUnicode=true&characterEncoding=utf-8&useSSL=false
spring.datasource.driver-class-name=com.mysql.jdbc.Driver
spring.datasource.username=root
spring.datasource.password=root
2.使用第三方的 Druid 数据源
spring.datasource.url=jdbc:mysql://localhost:3306/test?useUnicode=true&characterEncoding=utf-8&useSSL=false
spring.datasource.driver-class-name=com.mysql.jdbc.Driver
spring.datasource.username=root
spring.datasource.password=root
spring.datasource.type=com.alibaba.druid.pool.DruidDataSource
3.添加用户
1.创建 POJO
package com.dqcgm.springbootjdbc.pojo;

public class Users {


    private Integer userid;
    private String username;

    public Integer getUserid() {


        return userid;
    }

    public void setUserid(Integer userid) {


        this.userid = userid;
    }

    public String getUsername() {


        return username;
    }

    @Override
    public String toString() {


        return "Users{" +
                "userid=" + userid +
                ", username='" + username + '\'' +
                ", usersex='" + usersex + '\'' +
                '}';
    }

    public void setUsername(String username) {


        this.username = username;
    }

    public String getUsersex() {


        return usersex;
    }

    public void setUsersex(String usersex) {


        this.usersex = usersex;
    }

    private String usersex;
}
2.创建前端页面
<!DOCTYPE HTML PUBLIC "-//W3C//DTD HTML 4.01
Transitional//EN"
        "http://www.w3.org/TR/html4/loose.dtd">
<html xmlns:th="http://www.thymeleaf.org">
<head>
    <meta charset="UTF-8">
    <title>地球村公民首页</title>
</head>
<body>
<form th:action="@{/user/addUser}" method="post">
    <input type="text" name="username"><br/>
    <input type="text" name="usersex"><br/>
    <input type="submit" value="OK"/>
</form>
</body>
</html>
3.创建 Controller
1.PageController
package com.dqcgm.springbootjdbc.comtroller;

import org.springframework.stereotype.Controller;
import org.springframework.web.bind.annotation.PathVariable;
import org.springframework.web.bind.annotation.RequestMapping;

@Controller
public class PageController {


    @RequestMapping("/{page}")
    public String showPage(@PathVariable String page){


        return page;
    }
}
2.UsersController
@Controller
@RequestMapping("/user")
public class UsersController {


    @Autowired
    private UsersService usersService;

    /*** 添加用户 * @return */
    @PostMapping("/addUser")
    public String addUser(Users users) {


        try {


            this.usersService.addUser(users);
        } catch (Exception e) {


            e.printStackTrace();
            return "error";
        }
        return "redirect:/ok";
    }
}
4.创建 Service
@Service
public class UsersServiceImpl implements UsersService {


    @Autowired
    private UsersDao usersDao;

    /*** 添加用户 * @param users */
    @Override
    @Transactional
    public void addUser(Users users) {


        this.usersDao.insertUsers(users);
    }
}
5.创建 Dao
@Repository
public class UsersDaoImpl implements UsersDao {


    @Autowired
    private JdbcTemplate jdbcTemplate;

    @Override
    public void insertUsers(Users users) {


        String sql = "insert into users(username,usersex) values(?,?)";
        this.jdbcTemplate.update(sql, users.getUsername(), users.ge tUsersex());
    }
}
6.解决 favicon.ico 解析问题
<link rel="shortcut icon" href="../resources/favicon.ico" th:href="@{/static/favicon.ico}"/>
4.查询全部用户
1.修改 Controller
	@GetMapping("/findUserAll")
    public String findUserAll(Model model) {


        List<Users> list = null;
        try {


            list = this.usersService.findUsersAll();
            model.addAttribute("list", list);
        } catch (Exception e) {


            e.printStackTrace();
            return "error";
        }
        return "showUsers";
    }
2.修改业务层
 	@Override
    public List<Users> findUsersAll() {


        return this.usersDao.selectUsersAll();
    }
3.修改持久层
@Override
    public List<Users> selectUsersAll() {


        String sql = "select * from users";

        return this.jdbcTemplate.query(sql, new RowMapper<Users>() {


            /**
             * 结果集的映射
             * @param resultSet
             * @param i
             * @return
             * @throws SQLException
             */
            @Override
            public Users mapRow(ResultSet resultSet, int i) throws SQLException {


                Users users = new Users();
                users.setUserid(resultSet.getInt("userid"));
                users.setUsername(resultSet.getString("username"));
                users.setUsersex(resultSet.getString("usersex"));
                return users;
            }
        });
    }
4.创建页面显示查询结果
<!DOCTYPE HTML PUBLIC "-//W3C//DTD HTML 4.01 Transitional//EN"
        "http://www.w3.org/TR/html4/loose.dtd">
<html xmlns:th="http://www.thymeleaf.org">
<link rel="shortcut icon" href="../resources/favicon.ico" th:href="@{/static/favicon.ico}"/>
<head>
    <title>地球村公民首页</title>
</head>
<body>
<table border="1" align="center">

    <tr>
        <th>用户ID</th>
        <th>用户姓名</th>
        <th>用户性别</th>
        <th>操作</th>
    </tr>
    <tr th:each="u : ${list}">
        <td th:text="${u.userid}"></td>
        <td th:text="${u.username}"></td>
        <td th:text="${u.usersex}"></td>
        <td>
            <a th:href="@{/user/preUpdateUser(id=${u.userid})}">修改</a>
            <a th:href="@{/user/deleteUser(id=${u.userid})}">删除</a>
        </td>
    </tr>
</table>
</body>
</html>
5.更新用户
1.预更新查询
1.修改 Controller
@GetMapping("/preUpdateUser")
    public String preUpdateUser(Integer id, Model model) {


        try {


            Users user = this.usersService.findUserById(id);
            model.addAttribute("user", user);
        } catch (Exception e) {


            e.printStackTrace();
            return "error";
        }
        return "updateUser";
    }
2.修改业务层
@Override
    public Users findUserById(Integer id) {


        return this.usersDao.selectUserById(id);
    }
3.修改持久层
    @Override
    public Users selectUserById(Integer id) {


        Users user = new Users();
        String sql = "select * from users where userid = ?";
        Object[] arr = new Object[]{

     id};
        this.jdbcTemplate.query(sql, arr, new RowCallbackHandler() {


            @Override
            public void processRow(ResultSet resultSet) throws SQLException {


                user.setUsername(resultSet.getString("username"));
                user.setUsersex(resultSet.getString("usersex"));
                user.setUserid(resultSet.getInt("userid"));
            }
        });
        return user;
    }
4.创建用户更新页面
<!DOCTYPE HTML PUBLIC "-//W3C//DTD HTML 4.01 Transitional//EN"
        "http://www.w3.org/TR/html4/loose.dtd">
<html xmlns:th="http://www.thymeleaf.org">
<link rel="shortcut icon" href="../resources/favicon.ico" th:href="@{/static/favicon.ico}"/>
<head>
    <title>地球村公民首页</title>
</head>
<body>
<form th:action="@{/user/updateUser}" method="post">
    <input type="hidden" name="userid" th:value="${user.userid}"/>
    <input type="text" name="username" th:value="${user.username}"><br/>
    <input type="text" name="usersex" th:value="${user.usersex}"><br/>
    <input type="submit" value="OK"/>
</form>
</body>
</html>
2.更新用户操作
1.修改 Controller
@PostMapping("/updateUser")
    public String updateUser(Users users) {


        try {


            this.usersService.modifyUser(users);
        } catch (Exception e) {


            e.printStackTrace();
            return "error";
        }
        return "redirect:/ok";
    }
2.修改业务层
@Override
    @Transactional
    public void modifyUser(Users users) {


        this.usersDao.updateUsers(users);
    }
3.修改持久层
@Override
    public void updateUsers(Users users) {


        String sql = "update users set username = ?,usersex=? where userid = ?";
        this.jdbcTemplate.update(sql, users.getUsername(), users.getUsersex(), users.getUserid());
    }
6.删除用户
1.修改 Controller
@GetMapping("/deleteUser")
    public String deleteUser(Integer id) {


        try {


            this.usersService.dropUser(id);
        } catch (Exception e) {


            e.printStackTrace();
            return "error";
        }
        return "redirect:/ok";
    }
2.修改业务层
@Override
    @Transactional
    public void dropUser(Integer id) {


        this.usersDao.deleteUserById(id);
    }
3.修改持久层
@Override
    public void deleteUserById(Integer id) {


        String sql = "delete from users where userid= ?";
        this.jdbcTemplate.update(sql, id);
    }