03、Shiro 实战:Shiro集成 Spring
下面来说一下如何在Web下使用Shiro。
在大部分Web开发环境下,都是使用Spring与Shiro进行集成,所以下面直接来讲解Shiro与Spring集成的方式。
一、准备环境
(1)加入Spring和Shiro的jar包
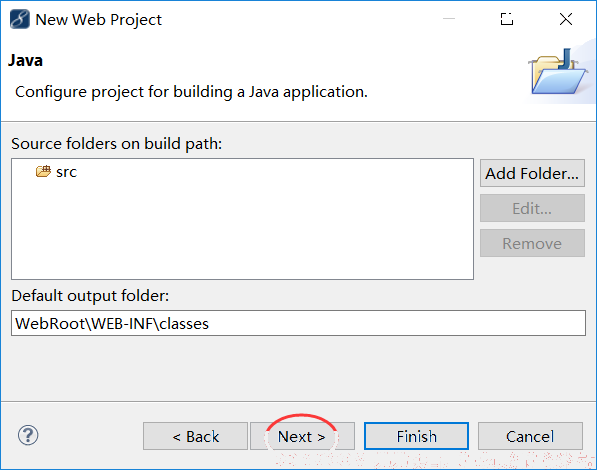
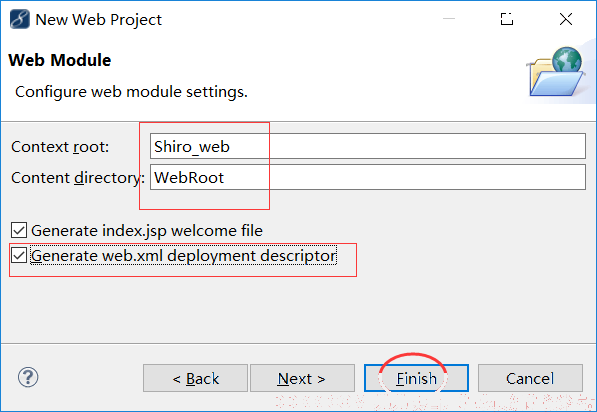
首先在MyEclipse中新建一个Web工程:


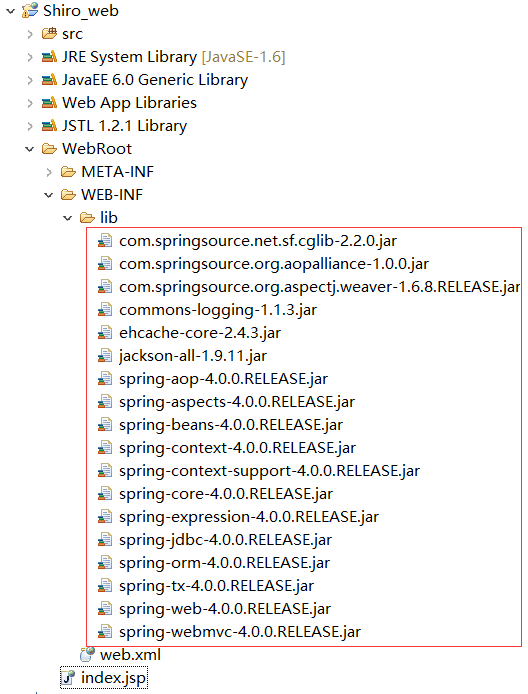
然后在lib下加入Spring的相关jar包:
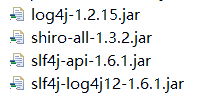
然后加入Shiro的相关jar包:
(2)配置Spring以及SpringMVC
接下来配置Spring:
首先在WEB-INF下的Web.xml中配置Spring的contextConfigLocation:
<?xml version="1.0" encoding="UTF-8"?>
<web-app xmlns:xsi="http://www.w3.org/2001/XMLSchema-instance"
	xmlns="http://java.sun.com/xml/ns/javaee"
	xsi:schemaLocation="http://java.sun.com/xml/ns/javaee http://java.sun.com/xml/ns/javaee/web-app_3_0.xsd"
	id="WebApp_ID" version="3.0">

	<context-param>
		<param-name>contextConfigLocation</param-name>
		<param-value>classpath:applicationContext.xml</param-value>
	</context-param>

	<listener>
		<listener-class>org.springframework.web.context.ContextLoaderListener</listener-class>
	</listener>

</web-app>
然后在src下新建applicationContext.xml文件:
<?xml version="1.0" encoding="UTF-8"?>
<beans xmlns="http://www.springframework.org/schema/beans"
	xmlns:xsi="http://www.w3.org/2001/XMLSchema-instance"
	xsi:schemaLocation="http://www.springframework.org/schema/beans
	http://www.springframework.org/schema/beans/spring-beans.xsd">

</beans>
然后配置SpringMVC环境,在Web.xml添加SpringMVC的前端控制器DispatcherServlet:
<servlet>
	<servlet-name>spring</servlet-name>
	<servlet-class>org.springframework.web.servlet.DispatcherServlet</servlet-class>
	<load-on-startup>1</load-on-startup>
</servlet>

<servlet-mapping>
	<servlet-name>spring</servlet-name>
	<url-pattern>/</url-pattern>
</servlet-mapping>
然后在WEB-INF下新建一个SpringMVC的配置文件,并加入SpringMVC的基本配置:
<?xml version="1.0" encoding="UTF-8"?>
<beans xmlns="http://www.springframework.org/schema/beans"
	xmlns:xsi="http://www.w3.org/2001/XMLSchema-instance"
	xmlns:mvc="http://www.springframework.org/schema/mvc"
	xmlns:context="http://www.springframework.org/schema/context"
	xsi:schemaLocation="http://www.springframework.org/schema/mvc http://www.springframework.org/schema/mvc/spring-mvc-4.0.xsd
		http://www.springframework.org/schema/beans http://www.springframework.org/schema/beans/spring-beans.xsd
		http://www.springframework.org/schema/context http://www.springframework.org/schema/context/spring-context-4.0.xsd">

	<context:component-scan base-package="com.test.shiro">
        </context:component-scan>

	<bean class="org.springframework.web.servlet.view.InternalResourceViewResolver">
		<property name="prefix" value="/"></property>
		<property name="suffix" value=".jsp"></property>
	</bean>

	<mvc:annotation-driven></mvc:annotation-driven>
	<mvc:default-servlet-handler/>

</beans>
其中加入包扫描、视图前后缀、注解的处理器适配器和映射器,以及基本的servletHandler。
然后在WebRoot下创建一个名为user的jsp页面:
<%@ page language="java" import="java.util.*" pageEncoding="UTF-8"%>
<!DOCTYPE HTML PUBLIC "-//W3C//DTD HTML 4.01 Transitional//EN">
<html>
  <head>
    <title>USER</title>
  </head>
  <body>
    This is User page. <br>
  </body>
</html>
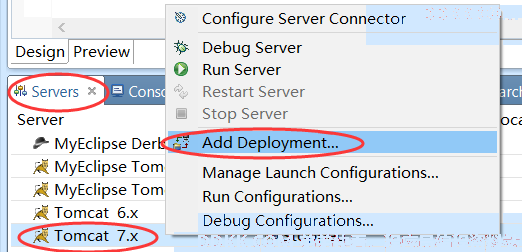
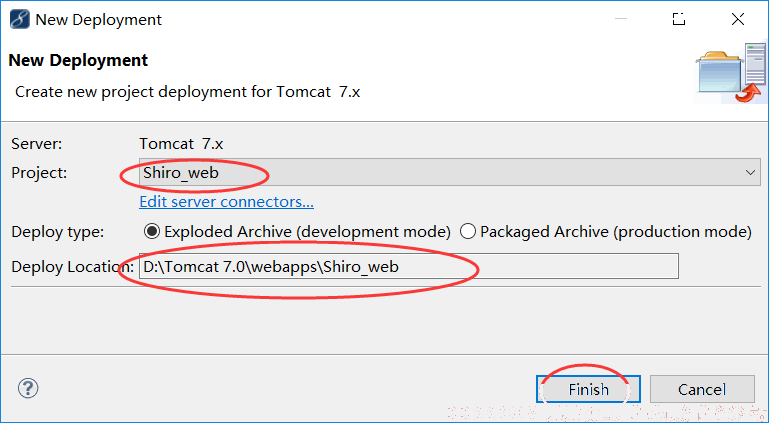
然后将Web项目部署在Tomcat中:
启动项目,访问之前添加的user页面,如果访问成功就可以看到相关页面:
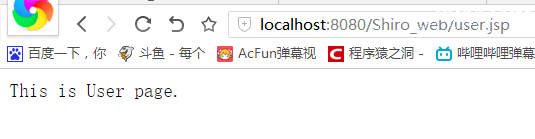
上面的jsp加载成功,证明我们的Spring和Spring MVC基本环境搭建成功。
(3)配置Shiro环境
接下来配置Shiro的开发环境:
首先在web.xml文件中添加Shiro的核心过滤
<!--
1. 配置  Shiro 的 shiroFilter.
2. DelegatingFilterProxy 实际上是 Filter 的一个代理对象. 默认情况下, Spring 会到 IOC 容器中查找和
<filter-name> 对应的 filter bean. 也可以通过 targetBeanName 的初始化参数来配置 filter bean 的 id.
-->
<filter>
	<filter-name>shiroFilter</filter-name>
	<filter-class>org.springframework.web.filter.DelegatingFilterProxy</filter-class>
	<init-param>
		<param-name>targetFilterLifecycle</param-name>
		<param-value>true</param-value>
	</init-param>
</filter>

<filter-mapping>
	<filter-name>shiroFilter</filter-name>
	<url-pattern>/*</url-pattern>
</filter-mapping>
然后在Spring的配置文件applicationContext.xml下加入Shiro的配置,由于文件中的配置比较多,不过不用着急,我们一个一个添加并分析。
1.配置SecurityManager
首先配置的第一个是Shiro的核心组件SecurityManager,在该配置中配置了三个属性,分别是cacheManager、authenticator以及realms。之前提到过CacheManager为缓存控制器,来管理如用户、角色、权限等信息的缓存,而authenticator负责Subject认证,Realm为安全实体数据源。
<!--1. 配置 SecurityManager-->
<bean id="securityManager" class="org.apache.shiro.web.mgt.DefaultWebSecurityManager">
    <property name="cacheManager" ref="cacheManager"/>
    <property name="realm" ref="shiroRealm"/>
</bean>
上面我们暂时配置了cacheManager与realm(可以配置多个,这里暂时配置一个)。authenticator的配置在之后的总结中详细讲解。
2.配置 CacheManager
紧跟着下面就是cacheManager的配置,这里需要使用第三方的缓存API,如Redis或ehcache。这里我们使用的是ehcache,其jar包已经添加在lib中,在cacheManager的配置中指定cacheManagerConfigFile的配置文件为ehcache的配置文件即可:
<!--
2. 配置 CacheManager.
2.1 需要加入 ehcache 的 jar 包及配置文件.
-->
<bean id="cacheManager" class="org.apache.shiro.cache.ehcache.EhCacheManager">
	<property name="cacheManagerConfigFile" value="classpath:ehcache.xml"/>
</bean>
ehcache.xml配置文件的内容在后面详述,这里先不详细讲解。
3.配置Realm
然后配置紧跟着是Realm的配置,由于测试样例目前不连接数据库,所以这里我们自定义一个Realm
配置:
<!--
	3. 配置 Realm
	3.1 直接配置实现了 com.test.shiro.realms.ShiroRealm 接口的 bean
-->
<bean id="jdbcRealm" class="com.test.shiro.realms.ShiroRealm"></bean>
里面就是我们自定义的Realm数据源,具体逻辑如下:
package com.test.shiro.realms;
import org.apache.shiro.authc.AuthenticationException;
import org.apache.shiro.authc.AuthenticationInfo;
import org.apache.shiro.authc.AuthenticationToken;
import org.apache.shiro.realm.Realm;
public class ShiroRealm implements Realm{
	@Override
	public AuthenticationInfo getAuthenticationInfo(AuthenticationToken arg0)
			throws AuthenticationException {
		return null;
	}
	@Override
	public String getName() {
		return null;
	}

	@Override
	public boolean supports(AuthenticationToken arg0) {
		return false;
	}
}
实现Realm数据源类,必须继承Realm提供的org.apache.shiro.realm.Realm接口,并实现getAuthenticationInfo、getName以及supports方法(这里主要讲解框架的搭建,具体方法细节在之后会详细介绍)。
4.配置LifecycleBeanPostProcessor
然后配置LifecycleBeanPostProcessor(Bean生命周期过程处理器,可以自动来调用配置在Spring IOC容器中shiro bean的生命周期方法. )
<!--
4. 配置 LifecycleBeanPostProcessor. 可以自动来调用配置在 Spring IOC 容器中 shiro bean 的生命周期方法.
-->
<bean id="lifecycleBeanPostProcessor" class="org.apache.shiro.spring.LifecycleBeanPostProcessor"/>
5.启用shiro 的注解
启用IOC容器中使用shiro的注解。但必须在配置了LifecycleBeanPostProcessor之后才可以使用:
<bean class="org.springframework.aop.framework.autoproxy.DefaultAdvisorAutoProxyCreator"
	  depends-on="lifecycleBeanPostProcessor"/>
<bean class="org.apache.shiro.spring.security.interceptor.AuthorizationAttributeSourceAdvisor">
	<property name="securityManager" ref="securityManager"/>
</bean>
6.配置ShiroFilter
记得之前我们在web.xml中加入了Shiro的过滤器,名称为“ShiroFilter”,而该bean就配置在
applicationContext.xml中:
<!--
6. 配置 ShiroFilter.
6.1 id 必须和 web.xml 文件中配置的 DelegatingFilterProxy 的 <filter-name> 一致.
若不一致, 则会抛出: NoSuchBeanDefinitionException. 因为 Shiro 会来 IOC 容器中查找和 <filter-name> 名字对应的 filter bean.
-->
<bean id="shiroFilter" class="org.apache.shiro.spring.web.ShiroFilterFactoryBean">
	<property name="securityManager" ref="securityManager"/>
	<property name="loginUrl" value="/login.jsp"/>
	<property name="successUrl" value="/list.jsp"/>
	<property name="unauthorizedUrl" value="/unauthorized.jsp"/>
	<!--
		配置哪些页面需要受保护.
		以及访问这些页面需要的权限.
		1). anon 可以被匿名访问
		2). authc 必须认证(即登录)后才可能访问的页面.
	-->
       <property name="filterChainDefinitions">
		<value>
			/login.jsp = anon
			# everything else requires authentication:
			/** = authc
		</value>
	</property>
</bean>
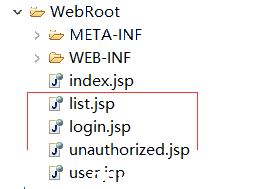
在上面的配置中,其中securityManager就是最上面的配置对应的bean,而loginUrl、successUrl以及unauthorizedUrl配置的是登录页面、登录成功页以及未授权页的路径,这里我们分别在WebRoot下添加这三个页面:
下面的filterChainDefinitions表示的是配置哪些页面需要受保护,以及访问这些页面需要的权限。说白了它就是代表一个过滤器的过滤数据集合。在filterChainDefinitions中我们仅配置login.jsp页面为可匿名访问的页面,其它所有页面都必须认证后才可访问。
上面完整的Shiro基础配置如下:
<?xml version="1.0" encoding="UTF-8"?>
<beans xmlns="http://www.springframework.org/schema/beans"
	xmlns:xsi="http://www.w3.org/2001/XMLSchema-instance"
	xsi:schemaLocation="http://www.springframework.org/schema/beans http://www.springframework.org/schema/beans/spring-beans.xsd">
    <!--1. 配置 SecurityManager-->
    <bean id="securityManager" class="org.apache.shiro.web.mgt.DefaultWebSecurityManager">
        <property name="cacheManager" ref="cacheManager"/>
        <property name="realm" ref="shiroRealm"/>
    </bean>

    <!--
    2. 配置 CacheManager.
    2.1 需要加入 ehcache 的 jar 包及配置文件.
    -->
    <bean id="cacheManager" class="org.apache.shiro.cache.ehcache.EhCacheManager">
        <property name="cacheManagerConfigFile" value="classpath:ehcache.xml"/>
    </bean>
    <!--
    	3. 配置 Realm
    	3.1 直接配置实现了 org.apache.shiro.realm.Realm 接口的 bean
    -->
    <bean id="shiroRealm" class="com.test.shiro.realms.ShiroRealm"></bean>

    <!--
    4. 配置 LifecycleBeanPostProcessor. 可以自定的来调用配置在 Spring IOC 容器中 shiro bean 的生命周期方法.
    -->
    <bean id="lifecycleBeanPostProcessor" class="org.apache.shiro.spring.LifecycleBeanPostProcessor"/>

    <!--
    5. 启用 IOC 容器中使用 shiro 的注解. 但必须在配置了 LifecycleBeanPostProcessor 之后才可以使用.
    -->
    <bean class="org.springframework.aop.framework.autoproxy.DefaultAdvisorAutoProxyCreator"
          depends-on="lifecycleBeanPostProcessor"/>
    <bean class="org.apache.shiro.spring.security.interceptor.AuthorizationAttributeSourceAdvisor">
        <property name="securityManager" ref="securityManager"/>
    </bean>

    <!-- 6. 配置 ShiroFilter.
    6.1 id 必须和 web.xml 文件中配置的 DelegatingFilterProxy 的 <filter-name> 一致.
       若不一致, 则会抛出: NoSuchBeanDefinitionException. 因为 Shiro 会来 IOC 容器中查找和 <filter-name> 名字对应的 filter bean.
    -->
    <bean id="shiroFilter" class="org.apache.shiro.spring.web.ShiroFilterFactoryBean">
        <property name="securityManager" ref="securityManager"/>
        <property name="loginUrl" value="/login.jsp"/>
        <property name="successUrl" value="/list.jsp"/>
        <property name="unauthorizedUrl" value="/unauthorized.jsp"/>
        <!--
        	配置哪些页面需要受保护.
        	以及访问这些页面需要的权限.
        	1). anon 可以被匿名访问
        	2). authc 必须认证(即登录)后才可能访问的页面.
        -->
        <property name="filterChainDefinitions">
            <value>
                /login.jsp = anon
                everything else requires authentication:
                /** = authc
            </value>
        </property>
    </bean>

</beans>
在上面的配置中,第二步配置中使用了ehcache,所以需要在src下添加名为"ehcache.xml"的配置文件:
<ehcache>

    <diskStore path="java.io.tmpdir"/>

    <cache name="authorizationCache"
           eternal="false"
           timeToIdleSeconds="3600"
           timeToLiveSeconds="0"
           overflowToDisk="false"
           statistics="true">
    </cache>

    <cache name="authenticationCache"
           eternal="false"
           timeToIdleSeconds="3600"
           timeToLiveSeconds="0"
           overflowToDisk="false"
           statistics="true">
    </cache>

    <cache name="shiro-activeSessionCache"
           eternal="false"
           timeToIdleSeconds="3600"
           timeToLiveSeconds="0"
           overflowToDisk="false"
           statistics="true">
    </cache>

    <defaultCache
        maxElementsInMemory="10000"
        eternal="false"
        timeToIdleSeconds="120"
        timeToLiveSeconds="120"
        overflowToDisk="true"
        />

    <cache name="sampleCache1"
        maxElementsInMemory="10000"
        eternal="false"
        timeToIdleSeconds="300"
        timeToLiveSeconds="600"
        overflowToDisk="true"
        />

    <cache name="sampleCache2"
        maxElementsInMemory="1000"
        eternal="true"
        timeToIdleSeconds="0"
        timeToLiveSeconds="0"
        overflowToDisk="false"
        />
</ehcache>
其中defaultCache是默认配置,其余的是我们后面需要测试时使用的cache配置。
目前已经将Shiro所有的基础配置编写完毕,这里保存applicationContext.xml文件,并重启项目。
根据Shiro的shiroFilter中的filterChainDefinitions配置,只能访问login.jsp页面,访问其它页面都应该被重定向到login.jsp页面:
至此,一个基本的Spring与Shiro的集成的效果就出来了。关于配置方面,还有很多配置以及细节
没有讲解,在后面的总结中会一一拓展和讲解。