48、发送http请求
TODO: 需要加上 http resource, 在 main.js。
只要有js的地方,就要有接口。 特别是我们这样前后端分离的SPA, 几乎每个页面都要发起http请求。从后台接口读取数据,并且显示在前台页面。
这就需要用到http请求了.
1. 调用http请求
vuejs 内置了对发送http请求的支持. 只需要在对应页面的script 标签内加上对应的代码就好.例如:
我们新增一个页面,叫 “博客列表页” : src/components/BlogList.vue, 它的作用是从我的个人网站(http://siwei.me) 上,读取文章的标题,并且显示出来。
代码如下:
<template>
  <div >
    <table>
      <tr v-for="blog in blogs">
        <td>{{blog.title }}</td>
      </tr>
    </table>
  </div>
</template>

<script>
export default {
  data () {
    return {
      title: '博客列表页',
      blogs: [
      ]
    }
  },
  mounted() {
    this.$http.get('api/interface/blogs/all').then((response) => {
       console.info(response.body)
       this.blogs = response.body.blogs
    }, (response) => {
       console.error(response)
    });
  }
}
</script>

<style >

td {
  border-bottom: 1px solid grey;
}
</style>
上面的代码中, 我们先看 <script/>代码段,
export default {
  data () {
    return {
      title: '博客列表页',
      blogs: [
      ]
    }
  },
  mounted() {
    this.$http.get('api/interface/blogs/all').then((response) => {
       console.info(response.body)
       this.blogs = response.body.blogs
    }, (response) => {
       console.error(response)
    });
  }
}
上面代码中,先是定义了两个变量: title, blogs, 然后定义了一个 mounted 方法。该方法表示当页面加载完毕后应该做哪些事情。是一个钩子方法。
this.$http.get('api/interface/blogs/all').then((response) => {
   console.info(response.body)
   this.blogs = response.body.blogs
}, (response) => {
   console.error(response)
});
上面代码,是发起http请求的核心代码。 访问的接口地址是 api/interface/blogs/all , 然后使用 then方法做下一步的事情,then方法接受两个函数作为参数,第一个是成功后干嘛,第二个是失败后干嘛。
成功后的代码如下:
this.blogs = response.body.blogs
然后,在对应的视图部分显示:
<tr v-for="blog in blogs">
  <td>{{blog.title }}</td>
</tr>
2. 远程接口的格式
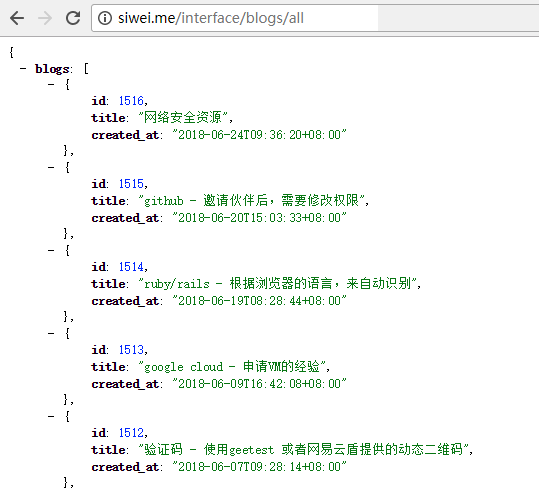
在我的服务器上,读取个人博客标题的接口我已经提前做好了,是 :
http://siwei.me/interface/blogs/all
内容如下;
{
  blogs: [
    {
      id: 1516,
      title: "网络安全资源",
      created_at: "2018-06-24T09:36:20+08:00"
    },
    {
      id: 1515,
      title: "github - 邀请伙伴后,需要修改权限",
      created_at: "2018-06-20T15:03:33+08:00"
    },
    {
      id: 1514,
      title: "ruby/rails - 根据浏览器的语言,来自动识别",
      created_at: "2018-06-19T08:28:44+08:00"
    },
    {
      id: 1513,
      title: "google cloud - 申请VM的经验",
      created_at: "2018-06-09T16:42:08+08:00"
    },
    {
      id: 1512,
      title: "验证码 - 使用geetest 或者网易云盾提供的动态二维码",
      created_at: "2018-06-07T09:28:14+08:00"
    }
    // 更多内容。。。
  ]
}
在浏览器中打开后,如下图所示(使用了 jsonview 插件做了json 的代码格式化):
3. 设置 Vuejs 开发服务器的代理
正常来说, javascript在浏览器中是无法发送跨域请求的,所以我们需要在vuejs的"开发服务器"上做个转发配置.
修改:config/index.js文件,增加下列内容:
module.exports = {
  dev: {
    proxyTable: {
      '/api': {        // 1. 对于所有以  "/api" 开头的url 做处理.
        target: 'http://siwei.me',   // 3. 转发到 siwei.me 上.
        changeOrigin: true,
        pathRewrite: {
          '^/api': ''  // 2. 把url中的 "/api" 去掉.
        }
      }
    },
}
上面的代码做了三件事:
1、 对于所有以“/api” 开头的url做处理.;
2、 把url中的 “/api”去掉.;
3、 把新的url请求打到 siwei.me上.;
例如:
注意: 以上的代理服务器内容,只能在"开发模式"下才能使用.在生产模式下,只能靠服务器的nginx的特性来解决js跨域问题.
修改后的 config/index.js文件的完整内容如下:
var path = require('path')

module.exports = {
  build: {
    env: require('./prod.env'),
    index: path.resolve(__dirname, '../dist/index.html'),
    assetsRoot: path.resolve(__dirname, '../dist'),
    assetsSubDirectory: 'static',
    assetsPublicPath: '/',
    productionSourceMap: true,
    productionGzip: false,
    productionGzipExtensions: ['js', 'css'],
    bundleAnalyzerReport: process.env.npm_config_report
  },
  dev: {
    env: require('./dev.env'),
    port: 8080,
    autoOpenBrowser: true,
    assetsSubDirectory: 'static',
    assetsPublicPath: '/',

    proxyTable: {
      '/api': {
        target: 'http://siwei.me',
        changeOrigin: true,
        pathRewrite: {
          '^/api': ''
        }
      }
    },

    cssSourceMap: false
  }
}
重启服务器,可以看到我们的转发设置已经生效:
$ npm run dev
...
[HPM] Proxy created: /api  ->  http://siwei.me
[HPM] Proxy rewrite rule created: "^/api" ~> ""
> Starting dev server...
...
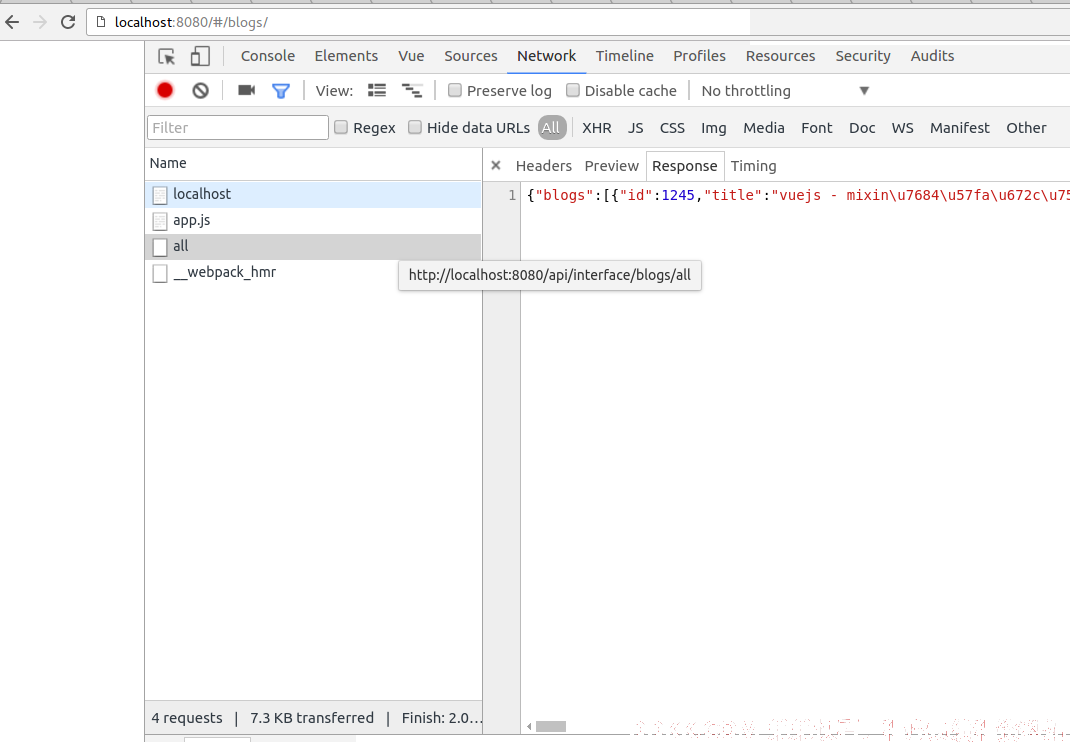
4. 打开页面,查看http请求
我们接下来,访问 http://localhost:8080/#/blogs/
打开chrome developer tools, 就可以看到,”Network”中,已经有请求发出去了,截图显示了结果:
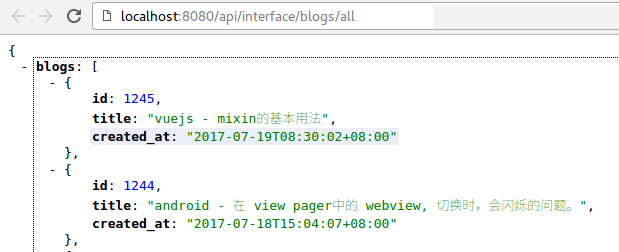
另外,我们也可以直接在浏览器中,输入要打开的链接,看到结果.(该浏览器使用了 json view插件)
5. 把结果渲染到页面中.
我们发现,在export代码段中,有两个部分:
<script>
export default {
  data () { },
  mounted() { }
}
</script>
实际上,上面代码中,
- data方法,是用于"声明页面会出现的变量",并且赋予初识值.(非常重要,切记这一点)
- mounted 表示页面被vue渲染好之后的钩子方法,会立刻执行.
所以,我们要把发送http的请求,写到mounted方法中.(钩子方法还有created, 我们可以暂且认为mounted方法与created方法基本一样,一般我们在Vue 2.0中都使用mounted. 后续会说到区别. )
  mounted() {
    this.$http.get('api/interface/blogs/all').then((response) => {
       this.blogs = response.body.blogs
    }, (response) => {
       console.error(response)
    });
  }
上面代码中:
- this.
$http 中的 - this 表示当前的vue组件(也即 BookList.vue)
$http 所有以$开头的变量,都是vue的特殊变量,往往是vue框架自带. 这里的$http就是可以发起http请求的对象.$http.get 是一个方法,可以发起get 请求. 只有一个参数就是目标url,- then() 方法,来自于promise, 可以把异步的请求写成普通的非异步形式.第1个参数是成功后的callback,第2个参数是失败后的callback.
- this.blogs = response.body.blogs 中,是把远程返回的结果(json ),赋予到本地. 由于javascript的语言特性,能直接支持json ,所以才可以这样写.
然后,我们通过这个代码进行渲染:
<tr v-for="blog in blogs">
  <td>{{blog.title }}</td>
</tr>
在上面的代码中:
- v-for是一个循环语法,可以把这个元素进行循环. 注意:这个叫directive, 指令,需要跟标签一起使用.
- blog in blogs: 前面的 blog 是一个临时变量,用于遍历使用.
后面的blogs 是http 请求成功后, this.blogs = ... 这个变量.
同时,这个this.blogs 是声明于 data钩子方法中.
{{blog.title}}用来显示每个blog.title的值
如何发起post请求?
跟get特别类似,就是第二个参数是 请求的body.
在 vue的配置文件中 (例如 webpack项目的 src/main.js 中)增加下面一句:
import VueResource from 'vue-resource';
Vue.use(VueResource);
....

//增加下面这句:
Vue.http.options.emulateJSON = true;
上面这句的目的,是为了能够让发出的post请求不会被浏览器转换成option 请求.
然后就可以按照下面的代码发送请求了:
this.$http.post('api/interface/blogs/all', {title: '', blog_body: ''})
    .then((response) => {
        ...
    }, (response) => {
        ...
    });
在本书的 《表单的提交》 章节中,会对 http POST 的发送有个实际的例子,看起来会更加明白。
关于发送http请求的更多内容,请看: 官方文档:https://github.com/pagekit/vue-resource
版权声明:「DDKK.COM 弟弟快看,程序员编程资料站」本站文章,版权归原作者所有