07、Shiro 速成:SpringBoot+Shiro 实现授权功能,Thymeleaf整合shiro和注解控制权限
回顾
之前有ini文件的时候,我们的授权是在ini文件里面书写的,现在权限是在数据库里面,那么就需要在realm里面自己写授权的代码了,因为要操作数据库
授权
授权就是判断认证用户是否具有指定角色或指定权限。
Shiro可以和JSP整合也可以和Thymeleaf整合,我们讲解SpringBoot的视图技术Thymeleaf整合Shiro。
只要是授权就执行Realm的doGetAuthorizationInfo进行判断,而触发doGetAuthorizationInfo的方式,常用的就两种:
1、 在页面中通过shiro:xxxx 属性进行判断
2、 在java代码中通过注解@RequiresXXX
Thymeleaf整合shiro
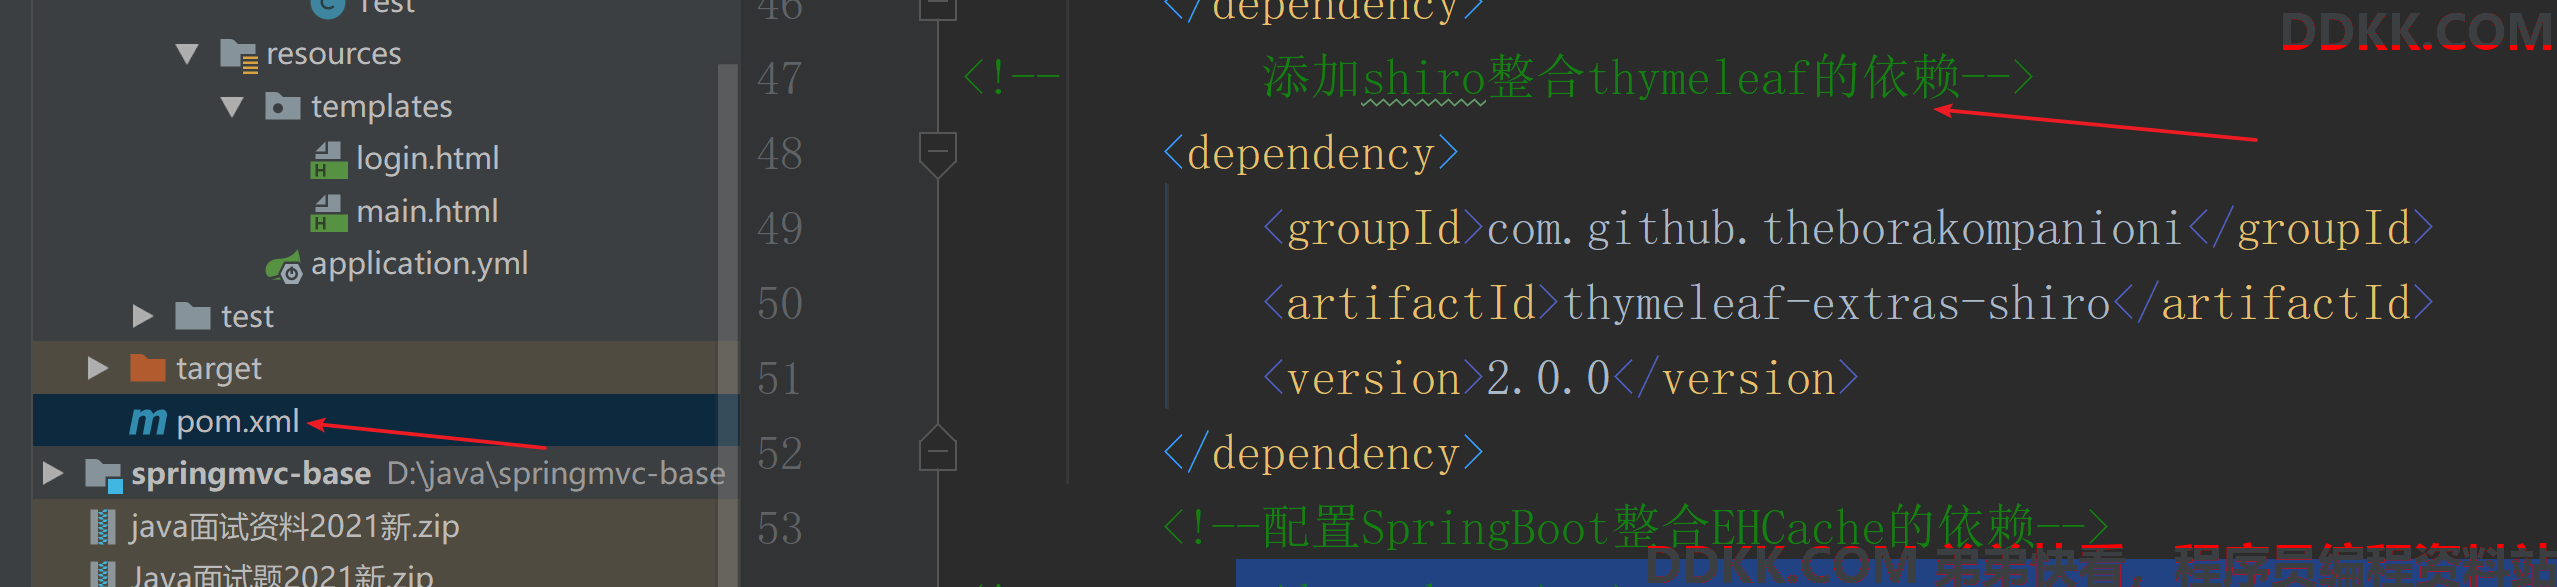
因为要在页面使用shiro,所以需要这个依赖
1添加依赖
<dependency>
    <groupId>com.github.theborakompanioni</groupId>
    <artifactId>thymeleaf-extras-shiro</artifactId>
    <version>2.0.0</version>
</dependency>
修改配置类
在配置类中com.config.ShiroConfig中添加。
负责解析thymeleaf中shiro:相关属性。
也就是后端如何解析页面的写的shiro的标签,就是通过这个配置类来解析的
@Bean
public ShiroDialect shiroDialect() {


    return new ShiroDialect();
}

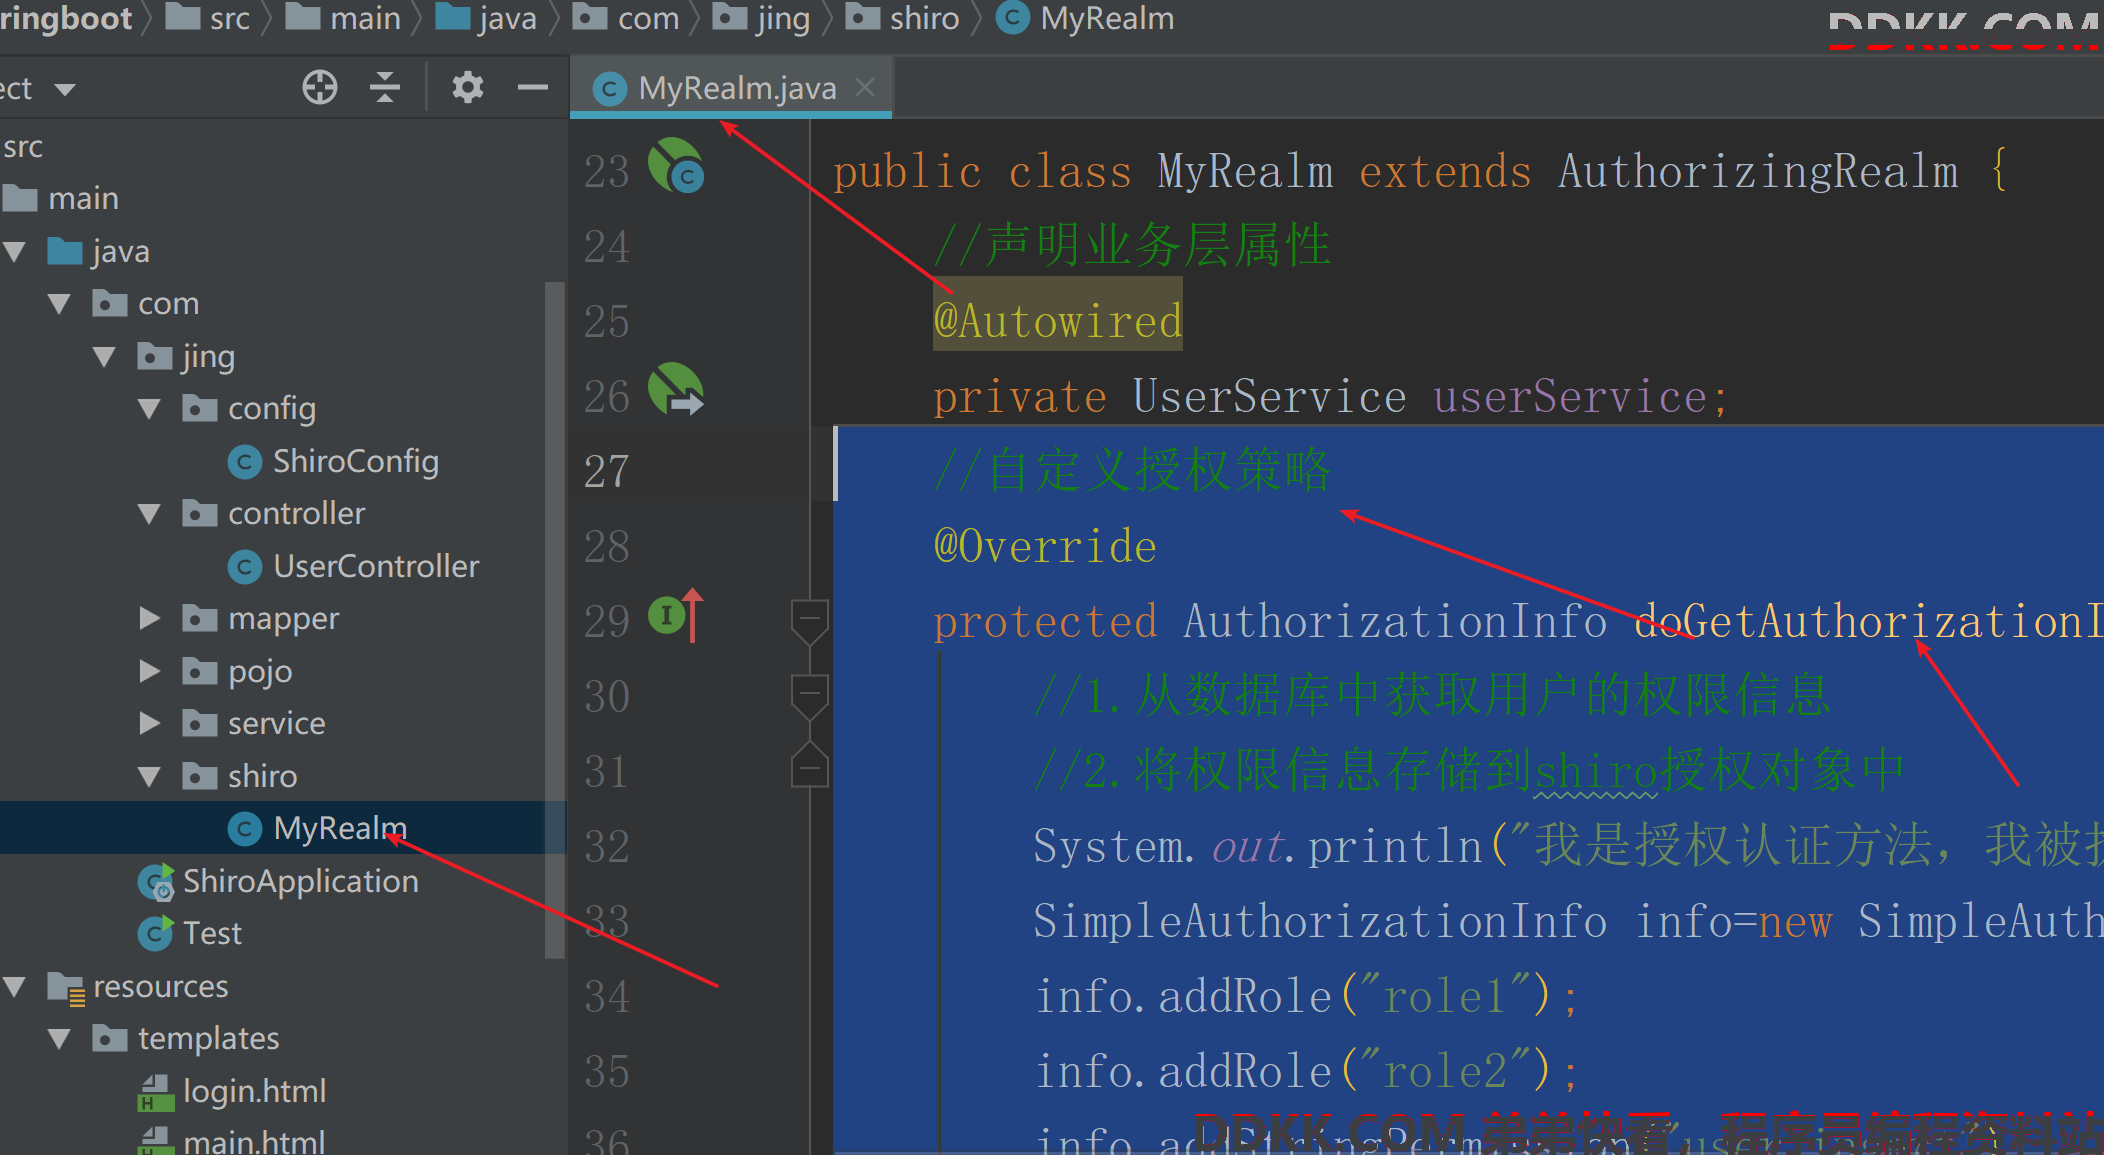
在realm里面写一个授权的方法
realm里面重写一个授权的方法:
里面的功能是: 根据当前用户从数据库里面查到对应的权限信息,保存到SimpleAuthorizationInfo对象里面。以后要验证权限的时候,之后从SimpleAuthorizationInfo对象里面拿出来进行验证。
//自定义授权策略
@Override
protected AuthorizationInfo doGetAuthorizationInfo(PrincipalCollection principals) {


    //1.从数据库中获取用户的权限信息
    //2.将数据库查询出来的权限信息存储到shiro授权对象中
    System.out.println("我是授权认证方法,我被执行了");
    SimpleAuthorizationInfo info=new SimpleAuthorizationInfo();
    info.addRole("role1");
    info.addRole("role2");
    info.addStringPermission("user:insert");
    info.addStringPermission("user:update");
    info.addStringPermission("sys:*");
    return info;
}
写页面
<!DOCTYPE html>
<html xmlns:th="http://www.thymeleaf.org"

将shiro引入

xmlns:shiro="http://www.pollix.at/thymeleaf/shiro">
<head>
    <meta charset="UTF-8">
    <title>Title</title>
</head>
<body>
    我是主页面
    <a href="/logout">退出</a>
    <hr>
    <span shiro:hasRole="role3">有角色</span><br>
    <span shiro:user="">shiro:user=””认证通过或已记住的用户</span><br>
    <span shiro:authenticated="">shiro:authenticated=””认证通过的用户。不包含记住的用户。</span><br>
    <hr>
    <a href="/demo">测试后台逻辑代码的授权</a>

</body>
</html>
thymeleaf中常用属性
需要在html页面中<html>添加属性
<html lang="en" xmlns:th="http://www.thymeleaf.org" xmlns:shiro="http://www.pollix.at/thymeleaf/shiro">

1.1shiro:user=””
认证通过或已记住的用户。
1.2shiro:authenticated=””
认证通过的用户。不包含记住的用户。
1.3shiro:principal
输出认证用户信息。<shiro:principal/>
1.4shiro:hasRole="admin"
判断是否具有指定角色。

1.5shiro:lacksRole="admin"
判断是否不是没有指定角色。

1.6shiro:hasAllRoles="role1,role2"
判断指定角色用户是否都具有。

1.7shiro:hasAnyRoles="role1,role2"
只要用户具有其中一个角色就表示判断通过。

1.8shiro:hasPermission="userInfo:add"
是否具有指定权限。

1.9shiro:lacksPermission="userInfo:del"
是否不具有指定权限

1.10shiro:hasAllPermissions="userInfo:view, userInfo:add"
是否全具有指定权限。

1.11shiro:hasAnyPermissions="userInfo:view, userInfo:del"
只要有其中任何一个权限即可。
在java代码中通过注解@RequiresXXX
通过注解实现权限的控制
使用注解判断方法是否具有权限执行
方法:可以用控制器方法,也可以是业务方法。常在控制器方法上添加注解进行判断。
常用注解:
(1)@RequiresPermissions("") 必须具有指定权限
(2)@RequiresAuthentication 必须已经认证
(3)@RequiresRoles("") 必须具有指定角色
(4)@RequiresUser 必须是已认证或记住用户
(5)@RequiresGuest 必须是访客

controller层代码为
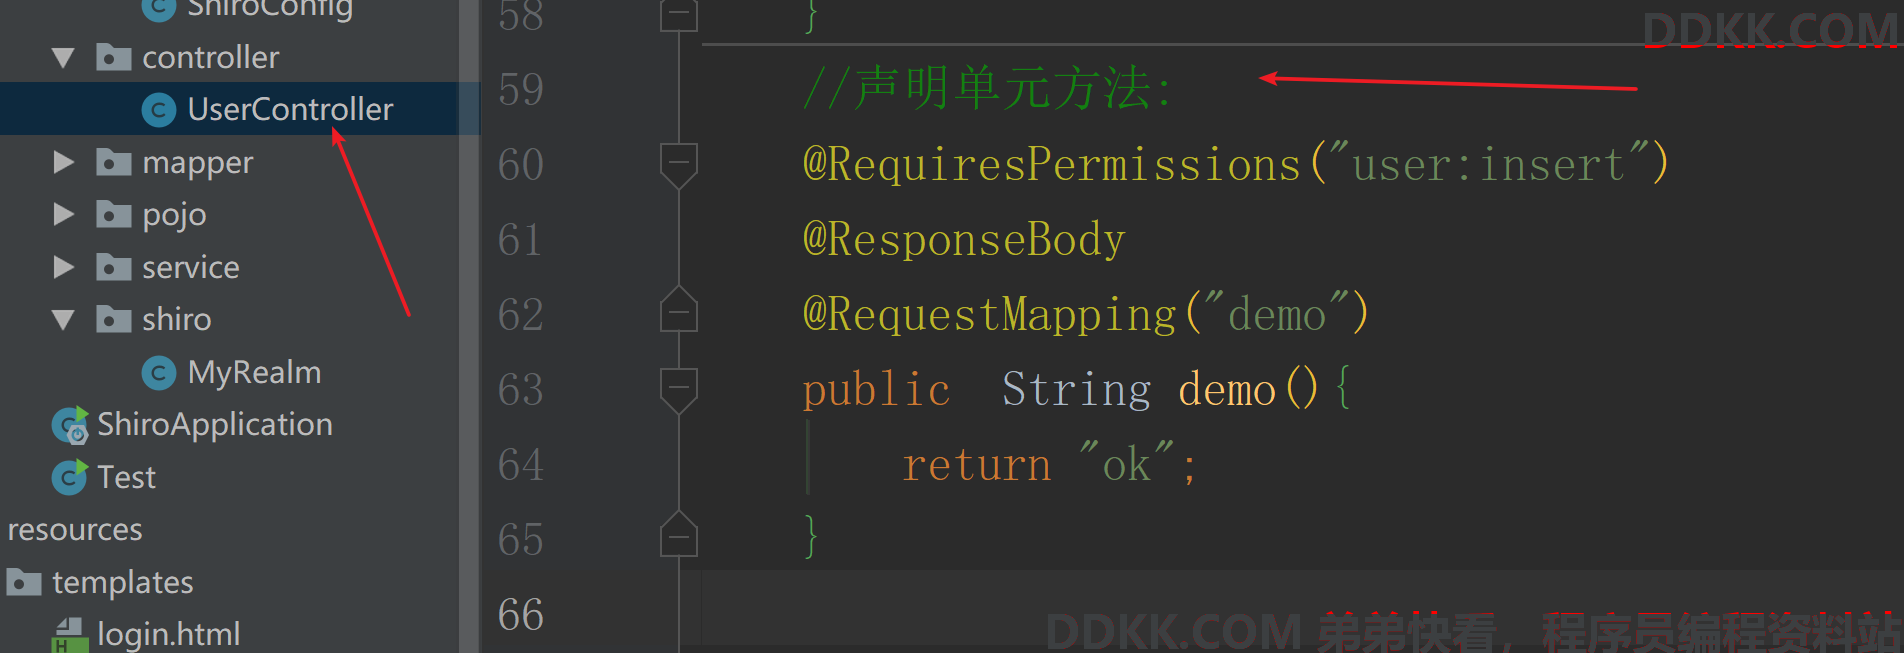
//声明单元方法:
@RequiresPermissions("user:insert")
@ResponseBody
@RequestMapping("demo")
public  String demo(){


    return "ok";
}
以上就是只有用户有对应的权限在SimpleAuthorizationInfo授权对象里面,才可以访问到对应权限的接口中。
如果没有对应的权限,现在出现的界面是
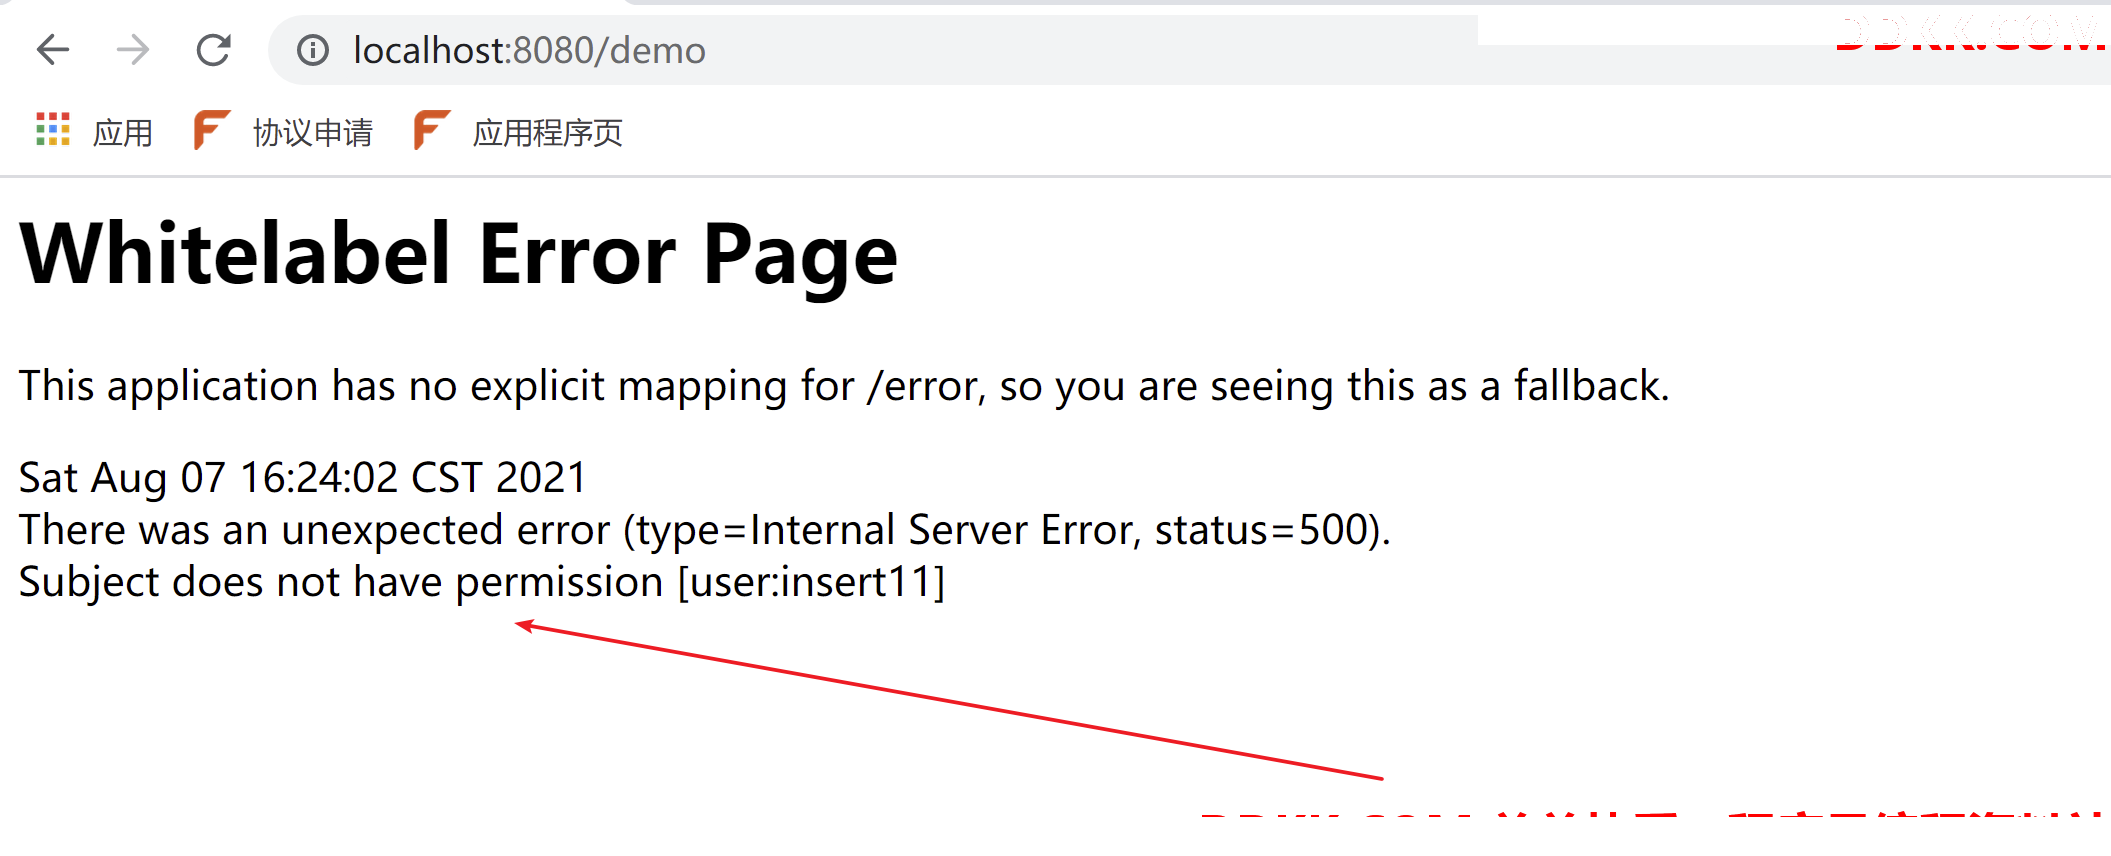
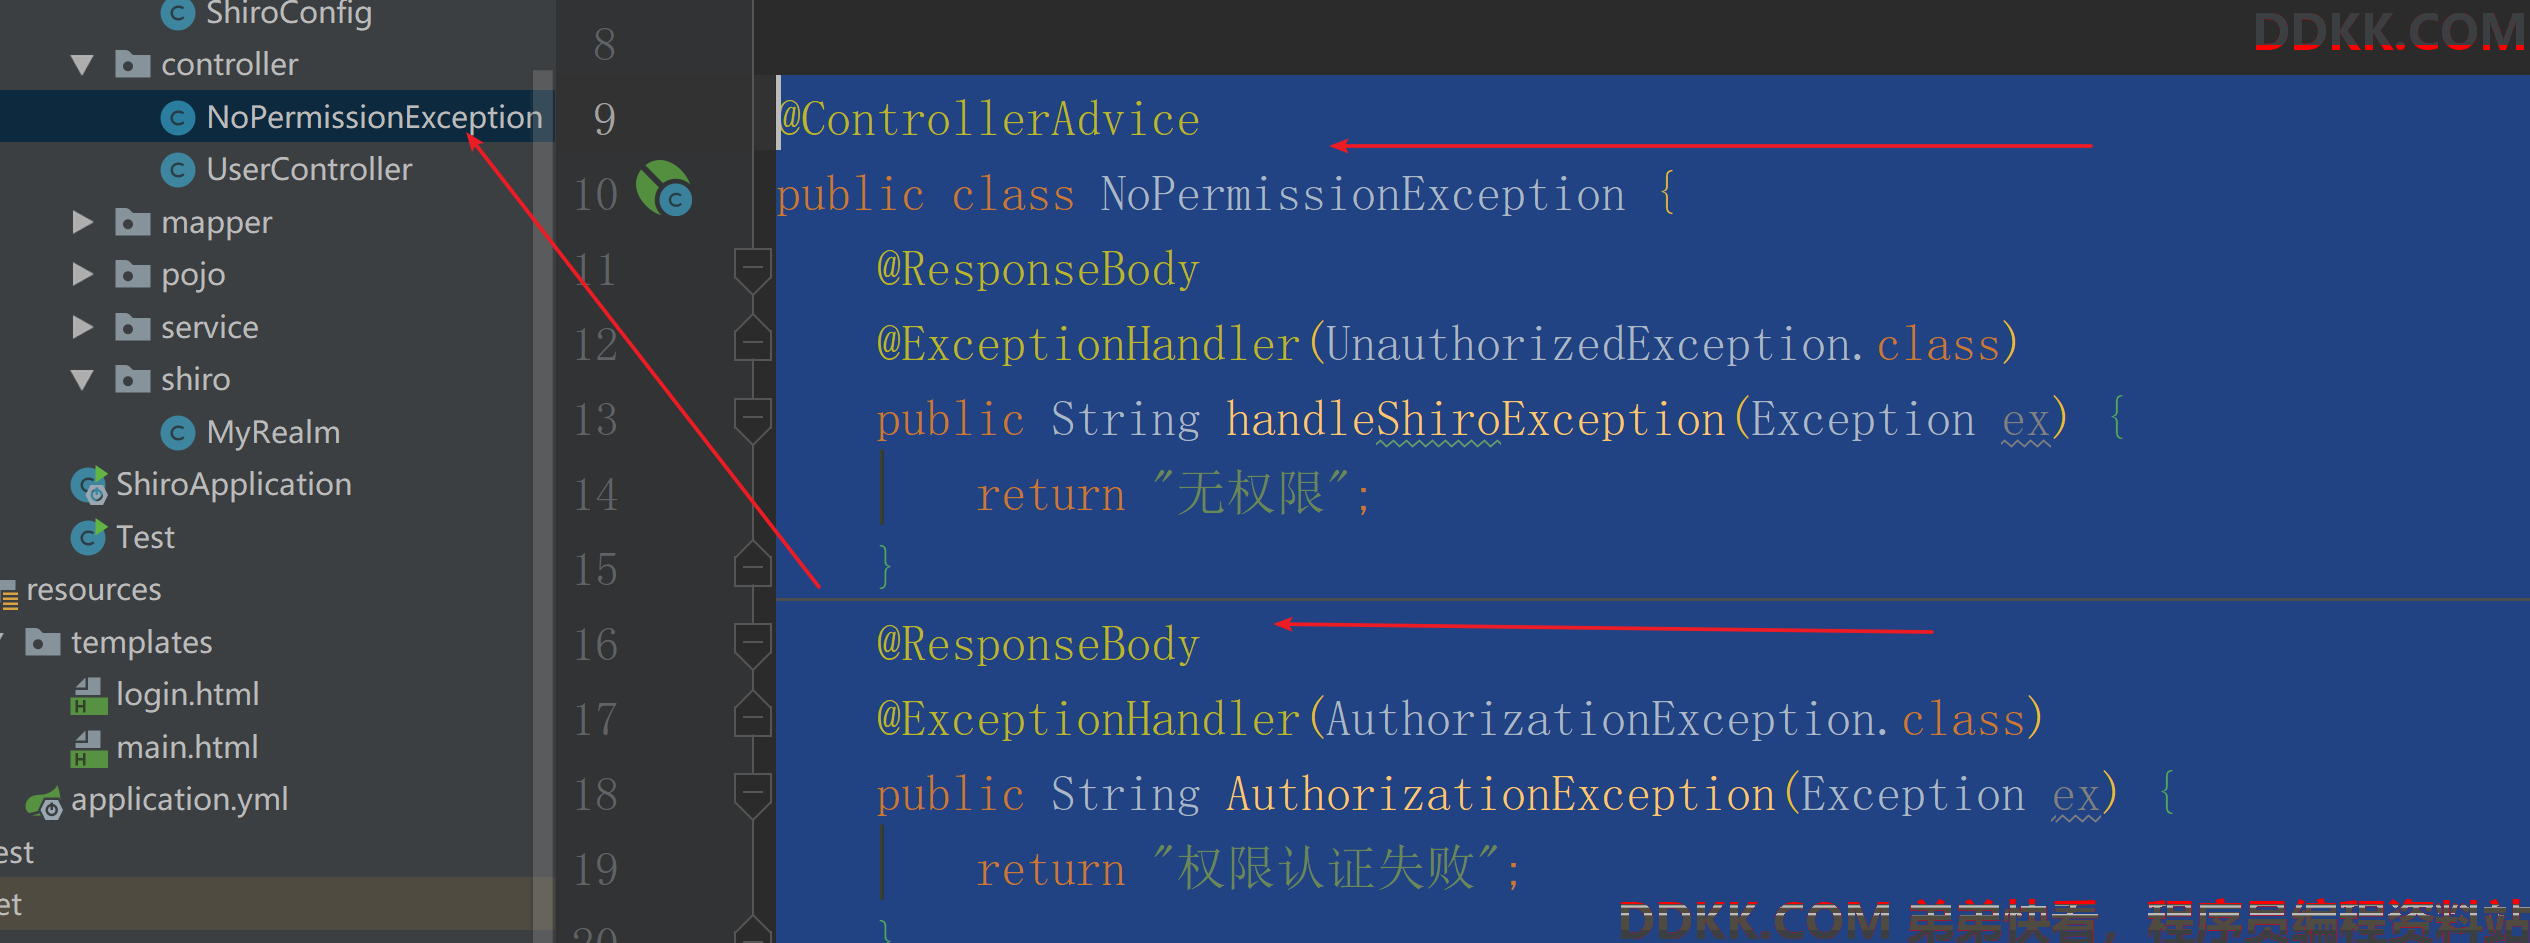
没有权限不能给用户这个界面,所以我们自定义一个没有权限后跳转的页面
@ControllerAdvice
public class NoPermissionException {


    @ResponseBody
    @ExceptionHandler(UnauthorizedException.class)
    public String handleShiroException(Exception ex) {


        return "无权限";
    }
    @ResponseBody
    @ExceptionHandler(AuthorizationException.class)
    public String AuthorizationException(Exception ex) {


        return "权限认证失败";
    }
}