15、Mybatis-Plus入门 - 代码生成器(3.5.0版本)
AutoGenerator
AutoGenerator 是 MyBatis-Plus 的代码生成器,通过 AutoGenerator 可以快速生成 Entity、Mapper、Mapper XML、Service、Controller 等各个模块的代码,极大的提升了开发效率。
也可以自定义生成模板,生成更丰富的后台代码,简化开发。
默认风格案例
(1)引入依赖
MyBatis-Plus 从 3.0.3 之后移除了代码生成器与模板引擎的默认依赖,需要手动添加相关依赖:
1、 添加代码生成器依赖,3.5.0不兼容之前的版本;
        <!--代码生成器-->
        <dependency>
            <groupId>com.baomidou</groupId>
            <artifactId>mybatis-plus-generator</artifactId>
            <version>3.5.0</version>
        </dependency>
1、 添加模板引擎依赖,MyBatis-Plus支持Velocity(默认)、Freemarker、Beetl,用户可以选择自己熟悉的模板引擎,如果都不满足您的要求,可以采用自定义模板引擎;
        <!-- 代码生成器模板引擎 -->
        <dependency>
            <groupId>org.apache.velocity</groupId>
            <artifactId>velocity-engine-core</artifactId>
            <version>2.3</version>
        </dependency>
(2)编写配置
详细配置说明参考官网
配置项列表:
| 配置项 | 说明 |
|---|---|
| 数据源配置 | DataSourceConfig:指定需要生成代码的具体数据库 |
| 数据库表配置 | StrategyConfig:指定需要生成哪些表或者排除哪些表 |
| 包名配置 | PackageConfig:指定生成代码的包路径 |
| 模板配置 | TemplateConfig:可自定义代码生成的模板,实现个性化操作 |
| 全局策略配置 | GlobalConfig |
| 注入配置 | InjectionConfig:可注入自定义参数等操作以实现个性化操作 |
public class Generator {
/**
* <p>
* 读取控制台内容
* </p>
*/
public static String scanner(String tip) {
Scanner scanner = new Scanner(System.in);
System.out.println("请输入" + tip + ":");
if (scanner.hasNext()) {
String ipt = scanner.next();
if (StringUtils.isNotBlank(ipt)) {
return ipt;
}
}
throw new MybatisPlusException("请输入正确的" + tip + "!");
}
public static void main(String[] args) {
// 全局策略配置
GlobalConfig globalConfig = GeneratorBuilder.globalConfigBuilder()
// 覆盖已生成文件
.fileOverride()
// 生成后是否打开生成目录
.openDir(true)
// 指定输出目录 默认值: windows:D:// linux or mac : /tmp
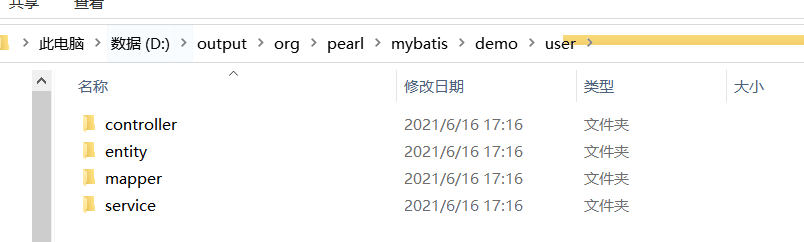
.outputDir("D:\\output")
// 生成swagger注解
.enableSwagger()
// 作者名
.author("pearl")
// 时间策略
.dateType(DateType.TIME_PACK)
// 注释日期格式
.commentDate("yyyy-MM-dd")
.build();
// 数据源配置
DataSourceConfig dataSourceConfig = new DataSourceConfig
// 驱动连接的URL、数据库连接用户名、数据库连接密码
.Builder("jdbc:mysql://127.0.0.1:3306/angel_admin?useUnicode=true&useSSL=false&characterEncoding=utf8&serverTimezone=Asia/Shanghai", "root", "123456")
// 类型转换,数据库=》JAVA类型
.typeConvert(new MySqlTypeConvert())
// 关键字处理 ,这里选取了mysql5.7文档中的关键字和保留字(含移除)
.keyWordsHandler(new MySqlKeyWordsHandler())
// 数据库信息查询类,默认由 dbType 类型决定选择对应数据库内置实现
.dbQuery(new MySqlQuery())
// 数据库 schema name
.schema("mybatis-plus")
.build();
// 包配置
PackageConfig packageConfig = new PackageConfig.Builder()
// 父包名。如果为空,将下面子包名必须写全部, 否则就只需写子包名
.parent(scanner("父包名"))
// 父包模块名
.moduleName(scanner("模块名"))
.build();
// 配置模板
//TemplateConfig templateConfig = new TemplateConfig.Builder().disable().build();//激活所有默认模板
// 添加以上配置到AutoGenerator中
AutoGenerator autoGenerator = new AutoGenerator(dataSourceConfig); // 数据源配置
autoGenerator.global(globalConfig); // 全局策略配置
autoGenerator.packageInfo(packageConfig); // 包配置
//autoGenerator.template(templateConfig); // 配置模板
// 生成代码
autoGenerator.execute();
}
}
(3)测试
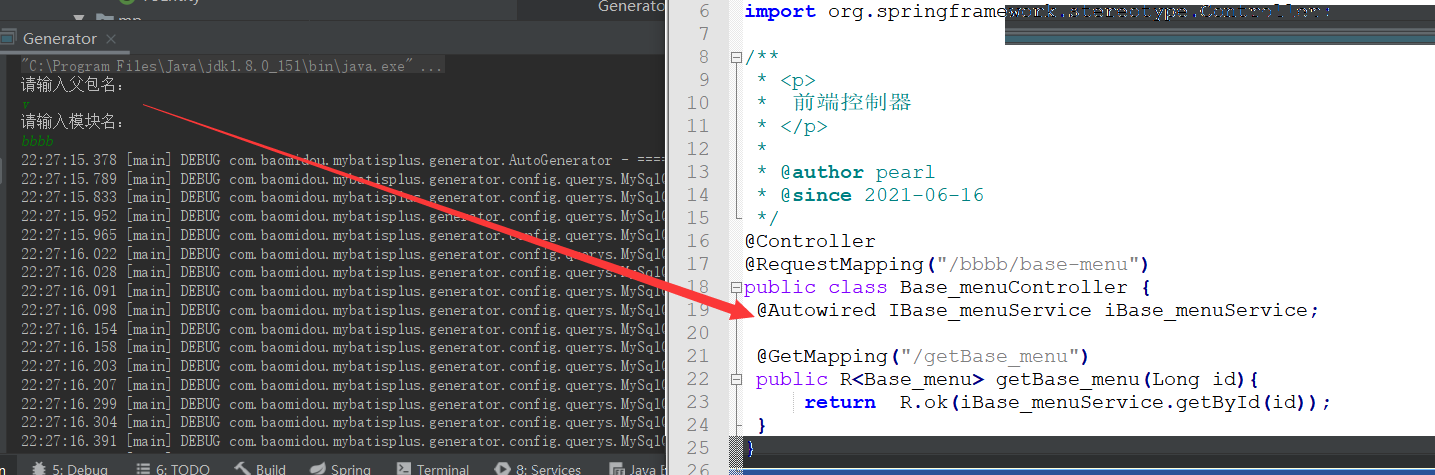
1、 启动main线程,输入;
 2、 查看生成文件,发现自动生成了相关代码,导入工程后即可使用,更加详细的配置参考官网即可,比如设置lombok、swagger、id生成策略等等;
自定义模板案例
使用默认模块可以生成代码,但是某些情况下,默认模板可能不满足当前需求,需要自定义模板,下面已
1、 替换velocity引擎为freemarker;
        <!-- 代码生成器模板引擎 -->
        <dependency>
            <groupId>org.freemarker</groupId>
            <artifactId>freemarker</artifactId>
            <version>2.3.31</version>
        </dependency>
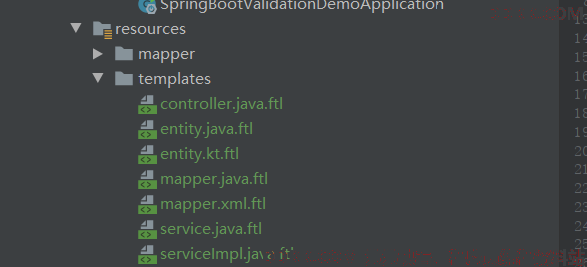
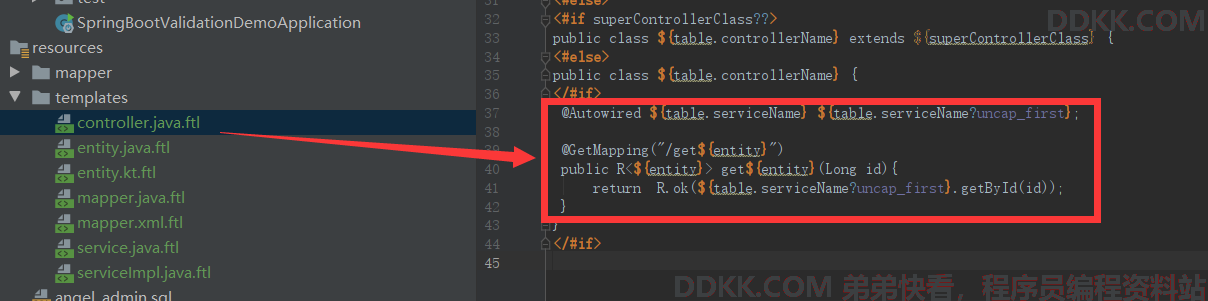
1、 复制源码中的模板到当前项目,只复制.ftl结尾的即可(freemarker模板);
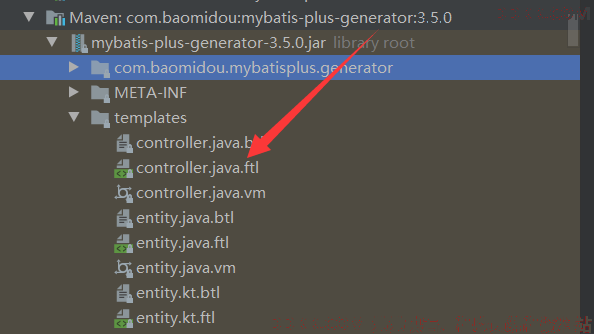
复制到当前目录:
 2、 生成类添加模板引擎配置;
        // 配置模板
        TemplateConfig templateConfig = new TemplateConfig.Builder()
                //指定自定义模板路径, 位置:/resources/templates/entity2.java.ftl(或者是.vm)
                //注意不要带上.ftl(或者是.vm), 会根据使用的模板引擎自动识别
                .build();

        // 添加以上配置到AutoGenerator中
        AutoGenerator autoGenerator = new AutoGenerator(dataSourceConfig); // 数据源配置
        autoGenerator.global(globalConfig); // 全局策略配置
        autoGenerator.packageInfo(packageConfig);    // 包配置
        autoGenerator.template(templateConfig); // 配置模板
        // 指定引擎 生成代码
        autoGenerator.execute(new FreemarkerTemplateEngine());
1、 根据需求,修改模板,比如在controller添加注入对应的service层,并添加根据ID查询实体类的接口;
 @Autowired ${

     table.serviceName} ${

     table.serviceName?uncap_first};

 @GetMapping("/get${entity}")
 public R<${

     entity}> get${

     entity}(Long id){


     return  R.ok(${

     table.serviceName?uncap_first}.getById(id));
 }
1、 测试,发现已经根据需求实现了响应的功能,实际使用时,应该是按需修改,这里只做简单演示;